
Blog
The Second World War resulted in the deaths of around 85 million people. Additionally, tens of millions more people were displaced. However, amid all the carnage, people demonstrated remarkable courage, fortitude, compassion, mercy and sacrifice. We want to honour and celebrate all of those people. In the War Years Blog, we examine the extraordinary experiences of individual service personnel. We also review military history books, events, and museums. We also look at the history of unique World War II artefacts, medals, and anything else of interest.

Operation Market Garden: Bridges and Cemeteries
Operation Market Garden battlefield tour 2025: From Joe's Bridge to Arnhem, exploring the 64-mile route of Montgomery's ambitious September 1944 plan to end the war by Christmas and its ultimate failure.
In July 2025, I spent four days in a coach full of like-minded individuals as we travelled from Dunkirk to Brussels and then followed the 64-mile route from Joe’s Bridge, Neerpelt, Belgium, to the famous John Frost Bridge at Arnhem, Holland.
Joe’s Bridge was the starting point of our Operation Market Garden tour, just as it had been the start line or centre line of advance for the Guards Armoured Division back in September 1944.
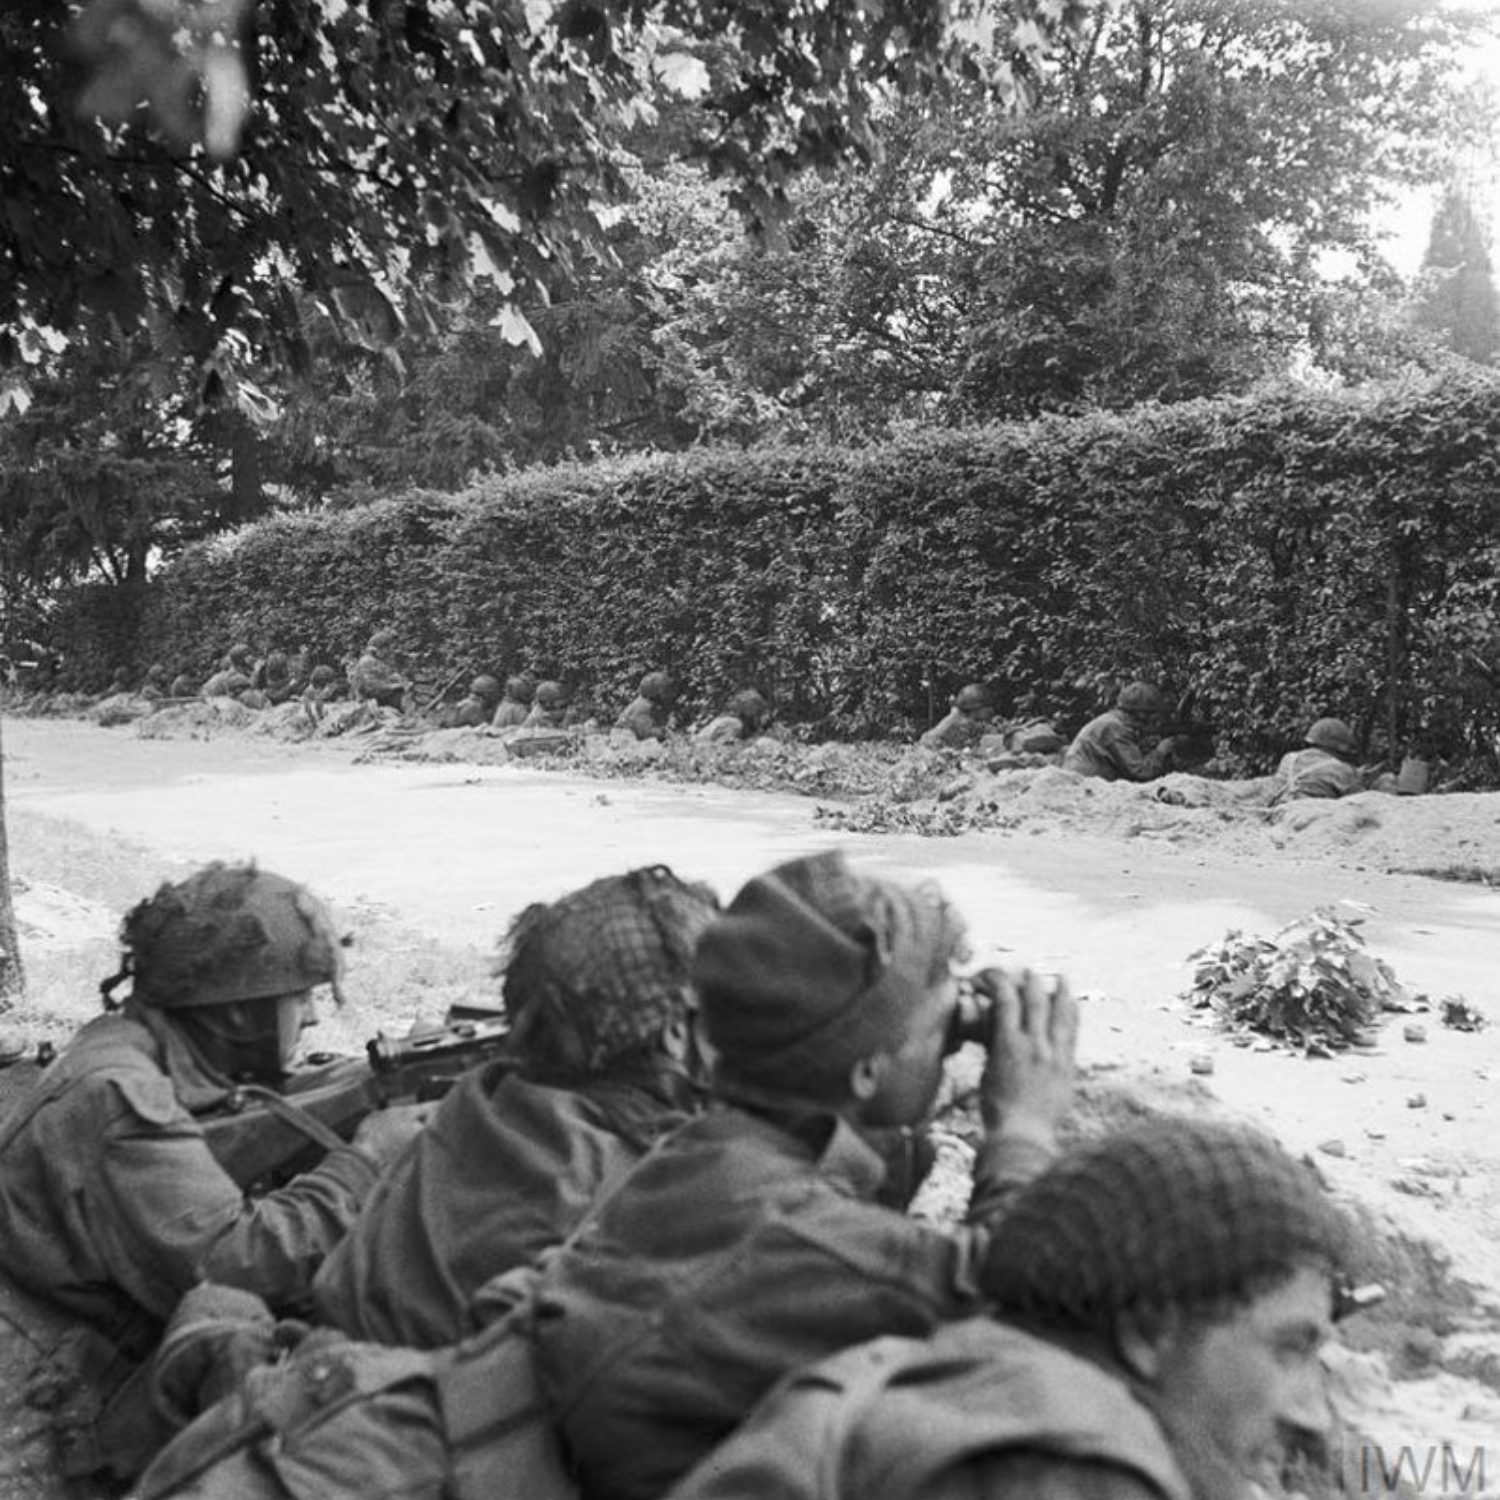
Operation Market Garden promised to end the war by Christmas 1944. Field Marshal Montgomery's audacious plan would drop 35,000 paratroopers (Three airborne divisions: the American 101st Division, the American 82nd Division, and the British 1st Airborne Division) across the Netherlands to capture key bridges. At the same time, British ground forces (30 Corps, spearheaded by the Guards Armoured Division) would advance 64 miles up a single highway, linking up with the airborne forces as they advanced. Furthest north, at the top of what would become known as ‘Hell’s Highway’, was the 1st Airborne Division, dropped and airlanded to the west of Arnhem. The British airborne troops expected to be relieved by the forward elements of 30 Corps within 48 hours of landing. Instead, what unfolded was nine days of desperate fighting that exemplified both the courage of ordinary British soldiers and the brutal, chaotic realities of war.
Joe's Bridge


Our battlefield tour began at Joe's Bridge in Lommel, Belgium, where Lieutenant Colonel John Ormsby Evelyn “J.O.E.” Vandeleur's Irish Guards achieved one of Market Garden's early victories. On 10 September 1944, a full week before the main operation, the 3rd Battalion Irish Guards launched a surprise assault that captured this strategic canal crossing intact.
The German defenders had prepared the wooden pontoon bridge for demolition, with two 88mm anti-tank guns positioned nearby and explosive charges wired for detonation. In his memoir, A Soldier’s Story (1967), J.O.E. Vandeleur recounts what happened:
At Exel, we found an unfinished road running due north to the Escaut Canal. It approached the canal in the shape of a “T”. The left half of the top of the “T” could not be seen from the Escaut Bridge. Halfway down the left half of the “T” stood a tall factory. We hid the head of the column behind the factory and ran upstairs, where we obtained a perfect view of the bridge. Incidentally, a large staff car full of German officers tried to cross us on the way up. We killed them and captured their maps. From the top window of the factory, every detail of the German defences could be clearly seen. At the top left corner of the “T”, there was a ‘jink’ in the road. This ‘jink’ was very important, because it denied the German 88 mm. guns a clear view of us until we were within 100 yards of the bridge. The problem now was, would the Germans blow the bridge or not?
We therefore decided to put it to the test. The plan was a very simple one. David Peel’s squadron was to send one troop of tanks commanded by Duncan Lampard up to the corner of the jink. This was to be accompanied by a platoon of the 3rd Battalion, commanded by John Stanley-Clark. This was to be the assault force with Michael Dudley’s company and the remainder of David Peel’s squadron engaging the enemy with point-blank fire for twenty minutes. It was to be a shooting match of twenty minutes’ duration. If, at the end of the twenty minutes, the bridge had not been blown, John Stanley-Clark and Duncan Lampard were to charge, followed by Hutton (R.E.) and six Guardsmen immediately to remove the explosive charges. We had no artillery support and were fifteen miles north of brigade headquarters, so there was no wireless touch. The signal for the assault was to be a green Very light.
It came off perfectly.
The structure, today known as Joe’s Bridge, was rebuilt after the war. The Irish Guards Memorial is situated on the northern bank and adjacent to Barrier Park.
Advancing up Hell’s Highway


On 17 September 1944, the seven-mile advance from Joe's Bridge to Valkenswaard, became the first test of Operation Market Garden's ambitious timetable.
The Irish Guards faced a brutal tactical reality: advance on a single road through terrain generally unsuitable for tanks. Dense woodland and marshy Dutch polder made deploying tanks off-road extremely difficult, and forced the Irish Guards to advance on a ‘one tank front’. The terrain proved a gift to the German defenders, who prepared a devastating ambush. In just two minutes, nine British Sherman tanks were knocked out.
Once again, J.O.E. Vandeleur describes what happened:
Zero hour was to be at 1435, and the start line was the Escaut Bridge. For this battle, we were supported by 350 guns and eight squadrons of Typhoon fighters of the Royal Air Force, who were to maintain a cab-rank of three aircraft immediately above us, ready to strike. The artillery was to fire a barrage, rolling at a speed of 200 yards a minute. Our tanks were marked with yellow streamers to identify them to the airmen. I was provided with an armoured signal tender for direct communication with the pilots in the sky. We were also given purple smoke shells to fire and identify targets for the airmen.
J.O.E. Vandeleur continues:
At zero hour, Keith Heathcote, commanding the leading tank, gave the order ‘Driver-Advance’ and he drove up to the edge of the barrage. Twenty-five minutes later, the rear half of the leading squadron (Mick O’Cock) and the leading half of No. 2 Squadron were knocked out, leaving Mick isolated and alone on the road. Luckily, Sergeant Cowan knocked out a self-propelled gun which had Mick in its sights. We had an armoured bulldozer high up in the column, ready to push aside knocked-out tanks and to help us cross a ditch just south of Valkenswaard.
No. 2 Squadron then took the lead, and Squadron Sergeant-Major Parkes was immediately killed. Duncan Lampard, who had distinguished himself at the Escaut Bridge, was wounded at the same time. I placed my headquarters behind the 2nd Squadron, which was fortunate on this occasion, as it gave us a ‘cushion’. Previously, we always moved at the tail of the leading squadron. I had a complicated wireless net to deal with. I had to speak to the pilots in the sky, telling them when to come in with their rockets and explaining targets to them. I had to keep my pulse on the artillery plan and call the barrage back when things were going badly. We had to issue orders to both battalions and feed information back. I insisted on the Air Force officer keeping the door of his tender open so that I could speak to him. He had never seen a ground battle before, and the afternoon’s affair must have been an eye-opener for him.
Division asked us how the battle was going. Denis lifted his microphone and merely said ‘Listen’. The noise was as if all hell had been opened; the crash of bursting shells and the screaming of the rockets as they left their cradles in the attacking aircraft.


Walking through Valkenswaard War Cemetery, I found the graves of Squadron Sergeant Major William Parkes and his comrades, men who died in those opening moments of the ground assault. Six unidentified Irish Guards lie within the cemetery. For those unfamiliar with the realities of tank warfare, when a vehicle was hit and caught fire, the crew usually had only seconds to escape the conflagration. Those crewmen who failed to escape were usually burned beyond recognition.
The cemetery, nestled in a pine forest between Valkenswaard and Westerhoven, contains 220 graves. The peaceful setting belies the violence that brought these soldiers to their deaths. Local Dutch families have adopted individual graves through the ‘Foundation Stichting 40-45’ program, decorating headstones and ensuring the soldiers’ sacrifices are not forgotten.
The ambush at Valkenswaard caused the first of many delays in the ‘Garden’ element of the operation. The Guards arrived in town during the evening instead of the planned early afternoon. Had the Irish Guards continued to Eindhoven in darkness, Market Garden’s timetable might have been preserved. Instead, the decision to spend the night in Valkenswaard contributed to delays that ultimately doomed the operation. However, it was a standard operating procedure that tanks ‘harboured’ overnight for maintenance, refuelling and rearming.
According to A History of the Irish Guards in the Second World War (1949), the first day’s fighting cost the 2nd Battalion nine tanks, eight men killed and several wounded. The 3rd Battalion lost seven killed and nineteen wounded. In the little cemetery outside the town are buried S.S.M. Parkes, Lance-Sergeant J. Waters, Guardsmen McD. Ackers, M. Delaney, W. Moore, J. Johnson, N. Malton and T. Watson.
The Day I Met Jackal


Our tour itinerary next took us to the vast German War Cemetery at Ysselsteyn before visiting the impressive Overloon War Museum. Within the museum resides a very special vehicle, an Mk. V Churchill tank of B Squadron, 4th (Tank) Battalion, Coldstream Guards, nicknamed Jackal. The tank was abandoned after hitting a mine during Operation Aintree (Battle of Overloon, 30 September to 18 October 1944). Two of the five crew were killed, Guardsmen Gordon Wright and Robert Silman, who are buried in Overloon War Cemetery, not far from the museum. Bob Dare, the tank’s driver, helped the other two crew members to safety. Bob and Jackal’s story is retold in my book, A History of the Guards Armoured Formations 1941-1945.
The Bridge at Grave


On 17 September, Lieutenant John “Jacko” Thompson of Easy Company, 504th Parachute Infantry Regiment, 82nd Airborne Division achieved one of the operation’s greatest successes when his small group of 16 men captured the strategically vital bridge over the Maas River at Grave. Although his company had been scattered during the parachute drop and landed far from their target, Thompson decided not to wait for reinforcements and immediately stormed the bridge, achieving complete surprise and capturing it undamaged. Thompson was wounded twice during the war and was decorated for his bravery with both the Bronze and Silver Stars. After the war, he returned to a career as a professional baseball player. The bridge remained crucial for Allied logistics throughout the war. In 2004, the crossing was renamed the John S. Thompson Bridge in honour of his decisive leadership and courage.
The Capture of the Nijmegen Road Bridge


For anyone who has seen the film, A Bridge Too Far (1977), you would be forgiven for believing Hollywood star Robert Redford captured the impressive Nijmegen road bridge, almost single-handedly, in the guise of Major Julian Cook. The truth is somewhat different, as any Grenadier Guardsman will happily tell you.
The war diary of the 2nd (Armoured) Battalion, Grenadier Guards for 20 September 1944 recounts the day’s events more prosaically than Director Richard Attenborough’s film:
Plan arranged with AIRBORNE FORCES to clear part of the town near the main road bridge, 1Bn AIRBORNE (AMERICAN) and the Bn Gp. Progress slow but sure and vicinity of bridge eventually reached at 1700 hrs with light casualties mainly through snipers. At 1900 hrs, a Tp of tanks was successfully rushed across the bridge, encountering at least one 88mm and passing through infantry on the far side, losing two tanks, one only temporarily, eventually linking up with AIRBORNE FORCES on the other side. Bridge consolidated by 2200 hrs.
The film is intended as entertainment rather than a historical documentary, so it glosses over the fact that the Americans had not secured either the road or rail crossings at Nijmegen by the time the Guards Armoured Division arrived. As a result, instead of passing over the road bridge and continuing to advance the ten miles to Arnhem, the Guards found themselves embroiled in the intense fighting that was ongoing in the town. In John Frost’s book, A Drop Too Many (1983), he cites the failure to secure the Nijmegen bridge on day one of the operation as perhaps the worst mistake of a tactical plan that was riddled with holes.
Crossing the Waal
The Grenadier Guards’ capture of the bridge required a coordinated attack with American paratroopers in one of the war’s most daring river crossings. Supported by the Irish Guards’ guns, Major Julian Cook’s 3rd Battalion, 504th Parachute Infantry Regiment made a daylight crossing of the 400-yard-wide Waal River in 26 flimsy canvas boats. The first wave suffered over 50 per cent casualties as German machine guns and artillery poured fire into the boats. Major Cook, a devout Catholic, recited “Hail Mary” prayers to encourage his men as they used rifle butts for oars.
Meanwhile, three columns of Grenadier Guards attacked from the south. Lieutenant Colonel Edward Goulburn’s forces coordinated with the Americans in a complex pincer movement. At around 1800 hrs, after the 504th PIR had secured the north end of both bridges, Sergeant Peter Robinson, 2nd Battalion, Grenadier Guards, led four Sherman tanks in a desperate charge across the road bridge. For his bravery, Robinson was awarded the Distinguished Conduct Medal, and, later, a grateful city granted him the Freedom of Nijmegen. Lieutenant Colonel Giles Vandeleur, commanding the 2nd Battalion, Irish Guards, and cousin of J.O.E. Vandeleur, witnessed the ‘Waal Crossing’ and remarked that it was one of the most courageous sights he had ever seen.
Standing on the Nijmegen road bridge today, you can imagine Robinson’s gunner engaging the German 88mm anti-tank gun in a brief but decisive duel. But by the time the bridge was secured, Market Garden was already 36 hours behind schedule. Early the next morning, Lieutenant Colonel John Frost would surrender his hold on the north end of the Arnhem bridge.
Arnhem Oosterbeek Cemetery


On the third day of our tour, we visited some of the Drop Zones and Landing Zones near Arnhem, seeing Ginkel Heath and the memorials there, the Glider Memorial at Wolfheze, and the original Airborne monument at Heelsum. Next, we stopped at the Arnhem Oosterbeek War Cemetery, where the dead from Arnhem are buried.
According to the Commonwealth War Graves Commission website, Arnhem Oosterbeek War Cemetery contains the graves of most of those killed during the September landings, and many of those killed in later fighting in the area.
There are now 1,684 Commonwealth servicemen buried or commemorated in the cemetery. 243 of the burials are unidentified, and special memorials commemorate two casualties. There are also 79 Polish, three Dutch and four non-war (including three former Commission employees) graves in the cemetery.
For Valour
The Victoria Cross (VC) is the highest and most prestigious military decoration awarded to British and Commonwealth personnel for acts of extreme valour. Notably, the cemetery includes the graves of Flight Lieutenant David Lord, Captain Lionel Queripel, and Lieutenant John Grayburn, all of whom were posthumously awarded the Victoria Cross for their bravery during the battle. The cemetery also commemorates Lance Sergeant John Baskeyfield.
While defending the Oosterbeek perimeter three days into the battle, Baskeyfield commanded a pair of anti-tank guns that destroyed several enemy tanks before the crews were killed. Baskeyfield subsequently fired the guns alone before he, too, was killed. His body was not identified after the war, and he has no known grave. The last paragraph of his VC’s citation states:
The superb gallantry of this N.C.O. is beyond praise. During the remaining days at Arnhem, stories of his valour were a constant inspiration to all ranks. He spurned danger, ignored pain and, by his supreme fighting spirit, infected all who witnessed his conduct with the same aggressiveness and dogged devotion to duty which characterised his actions throughout.
Every September, a joint Anglo-Dutch Service of Remembrance is held at the Oosterbeek War Cemetery, where local school children each lay a flower on the grave of a serviceman.
The General is Missing


In the afternoon, we travelled to the Hartenstein Hotel, Airborne Headquarters in 1944. Here we toured the superb museum with its extended displays and life-size recreations of the battle. A handful of us also walked the Oosterbeek defensive perimeter with battlefield guide Andy Ingham. For those not familiar with how the battle unfolded, when the attempt to capture Arnhem Bridge failed, Major General Roy Urquhart, commander of the 1st Airborne Division, ordered his forces into a defensive perimeter around Oosterbeek village, which is located about seven miles west of Arnhem. For six days, the airborne troops held this shrinking perimeter against overwhelming German forces in what became known as “the Cauldron.”
Next, we visited Oosterbeek Church and St Elisabeth’s Hospital. We also walked the nearby streets, retracing the steps taken by the “missing general”. At the start of the Battle of Arnhem, General Urquhart and Brigadier Lathbury went missing for some time. This created a dangerous command vacuum during the critical early stages of the operation, from Monday, 18 September, to the early hours of Tuesday, 19 September. Urquhart left his headquarters and went forward to assess the situation after radio communications failed. Lathbury was wounded, and Urquhart took refuge in the attic of a house near the hospital. As you approach Arnhem from Oosterbeek, the area around the hospital forms a bottleneck with the river and railway lines forming the sides, and where, in 1944, the Germans were quickly able to form blocking lines. The proximity of the railway marshalling yards meant that German reinforcements arriving from the Reich could immediately be fed into the battle. However, John Frost and a composite force of the 2nd and 3rd Parachute Battalions, Reconnaissance and Airborne Engineers made it through to the north end of the Arnhem road bridge before the Germans put a stopper in the bottle.
The John Frost Bridge


Our tour ended at the iconic Arnhem road bridge, or the John Frost Bridge (John Frostbrug) as it is known today. The actual road bridge defended by Frost’s 2nd Parachute Battalion was destroyed by the Allies a month after Operation Market Garden. Initially, the airborne troops held the north end of the bridge into Arnhem town and the surrounding buildings.
For three days and four nights, the lightly equipped airborne troops held off a superior German force that was armed with tanks, heavy artillery, and mortars. Eventually, the defenders' ammunition, food, and water ran low, forcing them to surrender, although some managed to evade capture. Of the 750 men who reached the bridge, 81 were killed, and virtually all the rest were wounded.
In 1977, the bridge was renamed for John Frost, despite his initial reluctance. He felt it was “too much of an honour” since they had lost the battle. Veteran Freddie Gough convinced him the accolade was deserved. Today’s bridge, rebuilt in 1948, closely resembles the original. However, due to urban development in the Arnhem area, the John Frost Bridge was not used in the filming of A Bridge Too Far. The scenes set around the Arnhem bridge were shot in Deventer, northeast of Arnhem.
The Cost of Market Garden


In all, the British 1st Airborne Division took just under 12,000 men into Arnhem. By Monday, 25 September, 1,485 men were dead, and around 6,500 were taken prisoner, and many of them were wounded. The RAF lost 68 aircraft shot down and around 500 aircrew killed. Due to incomplete records, German losses can only be estimated, and numbers vary between 2,500 and 5,000 casualties for the fighting around Arnhem. The evacuation of the Oosterbeek pocket saw 2,398 men escape capture. Around 450 Dutch civilians were also killed during the operation. Another 100,000 Dutch civilians were forcibly evicted from their homes in the Lower Rhine area by the Germans immediately after the fighting concluded. It is estimated that an additional 18,000 Dutch civilians died from malnutrition due to German reprisals, which included cutting the population's rations during what became known as the “Hunger Winter” of 1944/45.
Field Marshal Montgomery claimed that Market Garden was ninety per cent successful. Prince Bernhard of the Netherlands said that his country could ill afford another Montgomery success. In truth, for all the heroics and loss of life, the operation was a strategic failure.
The Irish Guards’ swift capture of Joe’s Bridge, their costly advance along Hell’s Highway, the Grenadier Guards’ seizure of the Nijmegen road bridge, and the doomed but heroic defence at Arnhem represent the finest traditions of British military service.
Final Thoughts
Today, these sites are accessible to anyone seeking to understand pivotal moments in European history. Museums provide context, cemeteries offer reflection, and the surviving bridges and battlefields let visitors walk in the footsteps of a remarkable generation.
The courage of the airborne forces, aircrew, and soldiers of 30 Corps during those nine days in September 1944 deserves to be remembered not just for their tactical achievements but for their embodiment of duty, courage, sacrifice, and camaraderie under the most extreme circumstances.
These historic sites remind us that behind every strategic decision and tactical manoeuvre were ordinary people, many barely out of their teens, who answered their nation’s call and paid the ultimate price in the fight against Nazi tyranny. In visiting these places, we hope to honour their memory and ensure their sacrifices will never be forgotten.
Further Reading
Much ink has been spilt on the subject of Operation Market Garden and the reasons for its failure. Amongst the books I have recently read on the subject are Arnhem by Major General R.E. Urquhart (1958), A Drop Too Many by Major General John Frost (1983), A Tour of the Arnhem Battlefields by John Waddy (1999), Arnhem 1944 by William F. Buckingham (2002), and Arnhem Black Tuesday by Al Murray (2024). I would also recommend It Never Snows in September: The German View of Market-Garden and the Battle of Arnhem September 1944 by Robert Kershaw (2008) and The Last German Victory: Operation Market Garden 1944 by Aaron Bates (2021).
Photographs & Sketches
Items in order of appearance
Gallery 1: Joe’s Bridge
Portrait of Lieutenant Colonel John Ormsby Evelyn “J.O.E.” Vandeleur, Irish Guards.
A Sherman tank of the 2nd (Armoured) Battalion Irish Guards, Guards Armoured Division, crossing the Meuse-Escaut Canal, Neerpelt, during Operation Market Garden, September 1944. George Rodger, Photographer, LIFE Magazine Archives.
Joe’s Bridge, July 20215, by the author.
Irish Guards Group memorial, Joe’s Bridge, July 2025, by the author.
Gallery 2: Hell’s Highway
IWM (Imperial War Museum), BU 925, Sherman tanks of the Irish Guards Group advance past others which were knocked out earlier during Operation 'Market-Garden', 17 September 1944.
IWM, BU 926, A Sherman Firefly tank of the Irish Guards Group advances past Sherman tanks knocked out earlier during Operation 'Market-Garden', 17 September 1944.
Guardsman William Gill Moore died during the ambush of this tank. The Sherman commanded by Lance Sergeant Dave Roper was struck by a Panzerfaust on 17th September 1944 during Operation Market Garden. Copyright “De bevrijding in Beeld" / "Vantilt fragma”.
IWM, BU 927, Squadron Sergeant Major William John Parkes of No. 3 Squadron, 2nd Irish Guards, killed when his Sherman tank was knocked out during the advance towards Eindhoven as part of Operation Market Garden. Photo taken on 17th September 1944 by Sergeant Carpenter, No. 5 Army Film and Photographic Unit.
Front page of The Illustrated London News of September 30, 1944. The village square of Valkenswaard, Sherman tank, “Snow White”, Brigade HQ, 5th Guards (Armoured) Brigade. Nationaal Archief (National Archives of the Netherlands).
Gallery 3: Valkenswaard War Cemetery
Headstones:
Guardsman W. Ackers, Irish Guards
Guardsman, Michael Dee, Irish Guards
L. Cpl. M.J. Delaney, Irish Guards
Squadron Sergeant Major (SSM) William John Parkes, Irish Guards
L. Sgt. John Watters, Irish Guards
Unidentified Irish Guardsman, known only to God.
Irish Guardsmen, Valkenswaard War Cemetery, all photographs by the author.
Gallery 4: Jackal
IWM, B 10809, A Churchill tank of 6th Guards Tank Brigade supporting infantry of 3rd Division attacking Overloon in the Netherlands, 14 October 1944.
IWM, BU 1232, Churchill tanks of the 6th Guards Tank Brigade lay a smokescreen during the advance on Venraij, 17 October 1944.
Charlie Trumpess with Mk. V Churchill tank of B Squadron, 4th (Tank) Battalion, Coldstream Guards, 6th Guards (Tank) Brigade, named Jackal, Overloon War Museum, July 2025, by the author.
British Churchill tank named Jackal formed part of the staff platoon, 2nd Squadron, 4th Battalion, Coldstream Guards, 6th Guards Tank Brigade that supported the infantry attack on Overloon – by the author.
Gallery 5: Grave
VIRIN: 440917-A-ZZ999-791, U.S. Department of War, US Army paratroopers are dropped near Grave, Netherlands, while livestock graze near gliders that landed earlier. Operation Market Garden.
John S. Thompsonbrug over the river Maas at Grave, July 2025, by the author.
Sketch of the Grave Bridge, September 1944, Sergeant Charles Murrell, Welsh Guards. Courtesy of the Welsh Guards.
Cyclists on the John S. Thompsonbrug over the Maas River at Grave, by Havang(nl).
The 82nd Airborne Memorial, beside the John S. Thompson bridge over the Maas River between Grave and Nederasselt, Netherlands, July 2025, by the author.
Gallery 6: Nijmegen Bridge
Cromwell tank of the Welsh Guards, Guard Armoured Division passes the "Schoonoord" corn mill in Alverna, Wijchen municipality near Nijmegen during Operation Market Garden. Nationaal Archief (National Archives of the Netherlands).
American paratroopers advance while being attacked by German anti-aircraft fire. According to the caption, the location is Arnhem, but it is more likely Nijmegen. The photograph is dated 10 September 1944, which must be a mistake. The picture is attributed to the US Army Signal Corps. Nationaal Archief (National Archives of the Netherlands).
IWM, EA 44531, tanks of the 2nd (Armoured) Battalion, Irish Guards, Guards Armoured Division, British XXX Corps cross the road bridge at Nijmegen during its capture. Operation Market Garden.
Battalion crosses the Nijmegen Bridge, 22nd September 1944, sketch by Sergeant Charles Murrell, Welsh Guards. Courtesy of the Welsh Guards.
Two sketches of the Nijmegen Bridge or Grenadiers Bridge by Sergeant Charles Murrell, Welsh Guards, 3rd November 1944. Courtesy of the Welsh Guards.
The Waalbrug or Nijmegen Road Bridge over the River Waal, July 2025, by the author.
Gallery 7: Arnhem Oosterbeek War Cemetery
The memorial on Ginkel Heath, Drop zone “Y”, where the 4th Para Brigade landed on Monday, 18th September 1944, during Operation Market Garden, by the author.
Gravestones of the fallen, Arnhem Oosterbeek War Cemetery, by the author.
In the centre of the photograph, Lt. Col. Sir William Richard De B. Des Voeux, BT, Grenadier Guards, 156th Battalion, 4th Para Brigade. Household Brigade Lodge No 2614 website.
The gravestone of Lt. Col. Sir William Richard De B. Des Voeux, BT, Grenadier Guards, 156th Battalion, 4th Para Brigade, by the author.
John "Jack" Grayburn was posthumously awarded the Victoria Cross for his actions with the 2nd Parachute Battalion at the Arnhem Bridge.
The gravestone of Lieutenant J.H. " Jack" Grayburn, VC, Parachute Regiment, Army Air Corps, by the author.
Lance Sergeant John Daniel Baskeyfield, VC. Gun Commander, 2 Anti-Tank Platoon, Support Company, 2nd (Airborne) Battalion, South Staffordshire Regiment, Battle of Arnhem. His body was never identified. Digitally enhanced portrait by the author.
Gallery 8: The General is Missing
IWM, BU 1136, Major-General Roy Urquhart DSO and Bar, commander of the British 1st Airborne Division during Operation Market Garden, plants the Airborne flag outside his headquarters (Hotel Hartenstein). By Smith, D M (Sgt), Army Film and Photographic Unit.
Rear of the Airborne Museum Hartenstein, Oosterbeek, July 2025, by the author.
A diorama of the 1st Airborne Division HQ and signals featuring a depiction of Major-General Roy Urquhart, Airborne Museum Hartenstein, Oosterbeek, July 2025, by the author.
Original wallpaper from the battle for Arnhem, inscribed “Never Surrender, Fuck the Gerry’s, 1st Airborne Division” and showing a tally of German soldiers killed. The photo also shows a No. 4 Lee Enfield rifle with a telescopic sight. Airborne Museum Hartenstein, Oosterbeek, by the author.
IWM, British paratroopers prepare for yet another attack on the Oosterbeek Perimeter.
Photo of a 3-inch mortar team, 1st Borders, defending the Oosterbeek perimeter, 200m from the Hartenstein Hotel (photo taken on the spot where the original was taken), by the author.
The ter Horst family home, which served as a Regimental Aid Post, inset, a picture of Kate ter Horst and her MBE medal, Oosterbeek. Known to the British as the “Angel of Arnhem”, she famously tended to hundreds of wounded and dying airborne troops during the Battle of Arnhem. By the author.
The Old Church (Oude Kerk) in Oosterbeek dates back to the 10th Century and is possibly the oldest church in the Netherlands. As the Oosterbeek Perimeter shrank, the church became a stronghold for the airborne troops, by the author.
A view of the Arnhem railway bridge from the rear of the Old Church, July 2025, by the author.
Our tour group outside the former St Elizabeth Hospital in Arnhem. The site was used as a military hospital by both sides during the fighting. Famously, Major-General Urquhart became trapped in the attic of No. 14 Zwarteweg, which is located to the rear of the hospital. Our battlefield guide, Andy Ingham, took the photo in July 2025.
Gallery 9: The John Frost Bridge
Girders, the John Frost Bridge, July 2025, by the author.
IWM, MH 2061, aerial view of the bridge over the Neder Rijn, Arnhem; British troops and destroyed German armoured vehicles are visible at the north end of the bridge.
Lieutenant Colonel John Frost led the 2nd Parachute Battalion to capture the northern end of the Arnhem Bridge and was later promoted to the rank of Major General.
IWM, HU 2127, the Arnhem Bridge after Frost's force had been overrun and the road cleared. Notice the destroyed buildings on the right.
Photo of the steps leading down to the riverbank, the north end of the Arnhem road bridge. Battlefield guide, Andy Ingham, holds a picture taken from precisely the same spot after the battle, showing the surrounding devastation. By the author.
Arnhem. War damage 1944/1945. View from the Sabelspoort towards the Grote Kerk (Great Church), 1945, Nationaal Archief (National Archives of the Netherlands).
The destroyed Rhine bridge (Arnhem road bridge) is seen from under the nearby temporary Bailey bridge, 1945, Nationaal Archief (National Archives of the Netherlands).
On 7 October, the Arnhem bridge was bombed and destroyed by B-26 Marauders of the 344th Bomb Group, USAAF. The buildings of Arnhem were bombarded by the Allies over the next few months and suffered further during the Liberation of Arnhem in April 1945.
Aerial view of the devastation in Arnhem's city centre. Above, the Rhine Bridge is under construction; the temporary Bailey Bridge has already been removed. To the left of the church is the town hall, partially preserved, 1946, Nationaal Archief (National Archives of the Netherlands).
The John Frost Bridge from the north bank of the lower Rhine, July 2025, by the author.
Charlie Trumpess standing on the north ramp of the John Frost Bridge, Arnhem, July 2025.
The Bridge, July 2025, by the author.
Gallery 10: The Cost of Market Garden
The temporary graves of two British paratroopers at a kilometre marker with the inscription “Arnhem 6”, 1945, Nationaal Archief (National Archives of the Netherlands).
Commemoration on 17 September at the Airborne Cemetery in Oosterbeek. The graves of the British paratroopers who fell in September 1944 are being specially cared for by Oosterbeek schoolchildren, 15 September 1955, Nationaal Archief (National Archives of the Netherlands).
Since the end of the war, school children in Oosterbeek, specifically primary school children, have participated in what has become an annual tradition of laying flowers at the Arnhem Oosterbeek War Cemetery to honour the heroes of the Battle of Arnhem.
References
Airborne Assault: ParaData - A living history of The Parachute Regiment and Airborne Forces
J.O.E. Vandeleur, A Soldier's Story, privately printed for the author by Gale & Polden, 1967
Major D.J.L. Fitzgerald, History of the Irish Guards In the Second World War, published by Aldershot Gale and Polden Ltd, 1949
National Army Museum, Archive Reference, 2016-10-23-76, Papers of Lt Col Sir James Newton Rodney Moore, War Diary, 2nd (Armoured) Bn Grenadier Guards, 20 September 1944
Major General John Frost, A Drop Too Many, published by Pen & Sword Military, Kindle Edition, 2019
Commonwealth War Graves Commission, 2024, A Visitor's Guide to the Best Arnhem WW2 Sites, URL: https://www.cwgc.org/our-work/blog/a-visitors-guide-to-the-best-arnhem-ww2-sites/, Accessed 15 August 2025
Cornelius Ryan Collection of World War II Papers (Digital), Cornelius Ryan WWII papers, box 115, folder 36: Giles A. Vandeleur, page. 2
Commonwealth War Graves Commission, 2023, Lance Serjeant John Daniel Baskeyfield VC, URL: https://www.cwgc.org/stories/stories/lance-serjeant-john-daniel-baskeyfield-vc/, Accessed 16 August 2025
Imperial War Museum, The Story Of Operation 'Market Garden' In Photos, URL: https://www.iwm.org.uk/history/the-story-of-operation-market-garden-in-photos, Accessed 19 August 2025
WartimeNI, Scott Edgar, Operation Market Garden: A Bridge Too Far, URL: https://archives.wartimeni.com/article/operation-market-garden-a-bridge-too-far/, Accessed 12 September 2025
SAS Battle Ready by Dominic Utton – a compendium of forty Special Air Service operations
In this book review, we examine SAS Battle Ready by Dominic Utton – a compendium of forty Special Air Service operations.
SAS Battle Ready is the latest book from journalist and author Dominic Utton. The book is an anthology of forty Special Air Service (SAS) operations since the unit’s formation in 1941.
The book is divided into three sections. The first section, Forged in War, briefly explains the early history of the SAS from inception during the North Africa campaign to Operation Archway three and a half years later. The next section of the book examines the period between 1952 and 2000. During this period the SAS evolved with the changing nature of global threats from the decline of the British Empire to the rise of international terrorism and hostage-taking. During this time, SAS operations spanned Malaya, Oman, Somalia, the Iranian Embassy siege, London, and the Falklands War. Finally, the book concludes with the Regiment’s most recent operations in Iraq and Afghanistan as part of the post-9/11 so-called War on Terror.
Perhaps due to his background in journalism, Dominic Utton has a talent for being able to summarise some of the world’s most complex conflicts in just a few brief sentences. In fact, he succeeds in telling the dramatic story of forty SAS operations from the early ‘shoot-and-scoot’ missions across the Libyan Desert to hunting for Scud missile launchers in Iraq with remarkable economy. The book also contains some fascinating facts, such as the SAS suffered 330 casualties during the Second World War while they manage to inflict around 31,000 losses on Axis forces. Clearly, David Stirling’s belief ‘that a few men could inflict more damage – with less risk - than in a traditional attack’ was fully proven.
Although SAS Battle Ready is a perfectly readable and informative book, I do have reservations about it. Firstly, a quick glance at the book’s bibliography reveals that no primary research was done whatsoever. If Mr. Utton did conduct his own research but simply neglected to cite his sources, then I stand corrected. Nonetheless, the book appears to be largely a compendium of other writers’ works. Because of Dominic Utton’s economy of research, SAS Battle Ready has nothing new to tell us about the SAS that hasn’t been said before. I, personally, have never attempted to conduct any research on British special forces. However, ex-SAS veterans like Rusty Firmin and Robin Horsfall are no longer hard men to find. In fact, both men have their own websites and are easily contactable via LinkedIn.
The lack of any evidence of primary research brings me to my second question, criticism, or concern about the writing of SAS Battle Ready, and that is why bother? Surely, given the right inputs an AI (artificial intelligence) application like ChatGPT or Google’s Bard could have produced something similar. Of course, the obvious, rather cynical answer to my own question as to why write yet another book about the SAS is that they’re popular and likely to sell. The ex-SAS soldier turned prolific author Steven Mitchel (pen-name Andy McNab) is a veritable one-man publishing house, turning out over 30 fiction and non-fiction titles based on his time with the Regiment.
It is difficult to give an exact number as new books about the Special Air Service are constantly being published. However, it is safe to say that hundreds of books have been written about the SAS since the end of the Second World War. Andy McNab’s Bravo Two Zero (1993) and Immediate Action (1995) have both become international bestsellers. More recent books like SAS: Rogue Heroes - The Authorised Wartime History by Ben Macintyre (2016) have been adapted for television and spawned a plethora of films, TV documentaries, reality TV shows, podcasts, and computer games. Audiences seem to have an insatiable appetite for all things SAS related. Luckily for the Ministry of Defence (MOD), the Regiment’s Winged Dagger unit insignia and famous ‘Who Dares Wins’ motto is Crown copyright protected, which hopefully contributes to our dwindling defence budget, but I digress. Military history and the media and entertainment industries have always had a symbiotic relationship, and long may it continue. However, writing books about the SAS that have nothing new to say and simply rehash other authors’ works seem a little cynical and opportunistic.
I’m sure Dominic Utton’s SAS Battle Ready will sell, and the publisher will no doubt see a return on their investment. Overall, I cannot help feeling a bit cheated by the book’s lack of effort. Perhaps, whoever plays it safe also wins.
SAS Battle Ready by Dominic Utton is published by Michael O’Mara Books Ltd., 2023.
John Thorne, British Prisoner of War: Escape, Camp Life and Liberation
Cpl. John Thorne joined the Territorial Army in 1939. By 27 May 1940, John was a prisoner of war (PoW) and headed for a series of camps in Poland and Germany. John would escape, only to be recaptured. Eventually, John was sent to Stalag 383 where he would remain until April 1945. This is his story.
John Thorne joined the Territorial Army in 1939. By 27 May 1940, John was a prisoner of war and headed for a series of camps in Poland and Germany. John would escape, only to be recaptured. Eventually, John was sent to Stalag 383 where he would remain until April 1945. A member of the Scout Movement in civilian life, John was a founding member of the camp’s Richard Coeur-de-Lion, Rover Scout Crew. When the camp was evacuated by the Germans in April 1945, John and some of his comrades escaped once again. However, John’s bid for freedom and journey home did not pass without incident. This is his story.
John in uniform, probably taken in 1939 or 1940 before his deployment with the 5th Buffs to France.
April 1939
John joined the Territorial Army (TA), the 4th/5th Battalion, Royal East Kent Regiment (the Buffs). The 5th Battalion was reformed in 1939 as a 2nd Line duplicate of the 4th Battalion when the Territorial Army was doubled in size. Initially, the 5th Buffs was assigned to the 37th Infantry Brigade, part of the 12th (Eastern) Infantry Division, which was a 2nd Line duplicate of the 44th (Home Counties) Division. However, on 26 October 1939, it was transferred to the Division's 36th Infantry Brigade in exchange for the 2/6th East Surreys.
The 5th Buffs, along with the 6th and 7th Royal West Kents, remained in the 36th Brigade for the rest of the war. The battalion served with the BEF (British Expeditionary Force) in France in 1940 and fought in the Battle of France and was evacuated at Dunkirk. The 12th Division suffered heavy casualties. Unfortunately, many of the men had only very basic training before embarkation. The Division also received minimal artillery support.1
July 1939
John was promoted to full Corporal at Wannock Camp near Eastbourne.
August 1939
John’s unit was mobilised, and he was officially ‘called up’ for active service.
September 1939
The Second World War starts. John is assigned to guard Dover Priory Station and railway tunnels.
October 1939
John is promoted to acting Lance-Sergeant, Dover Priory Station, second in command (2IC) of the guard.
November 1939
John is sent on a course to the brigade tactical school (junior commanders). He reverts to the rank of Corporal. He passed the course and was recommended for a commission and then re-joined his battalion at Canterbury.
January 1940
John is sent on gas and passive air defence (camouflage and concealment) courses. Again, he is recommended for a commission.
14 April 1940
The brigade is sent to France as part of British Expeditionary Force (BEF).
May 1940
John’s unit was based at Fleury-sur-Andelle near Rouen, Normandy. He gave lectures to troops on gas and passive air defence. He was informed by his battalion commander that he would be sent home to start officer training. He was supposed to report to Aldershot on 6 June 1940.
10 May 1940
Germany invades Holland. John’s battalion is moved to Doullens, a major road intersection between Abbeville and Arras and Amiens and Saint-Pol-sur-Ternoise, making it strategically important. The battalion was based at a Catholic Seminary (boy’s school) and tasked with placing roadblocks across bridges.
20 May 1940
The 5th Buffs covered a frontage of approximately 6.5 miles with three companies forward, from Pommera on the right to La Herliere. The 6th Royal West Kent, on their right, covered the approaches to Doullens. Probably the first sign of impending trouble was a wave of retreating French soldiers who passed through the line held by the Buffs. Next, the 6th Royal West Kent positioned were shelled and machine-gunned. By 12.30hrs German tank and infantry attacks were coming in along the British extended defensive line.
At about 13.00hrs the 5th Buffs were ordered to withdraw. However, it appears that this order never reached the forward companies. According to John’s written testimony, his battalion was attacked and quickly overrun by what he believed to be units of the 6th Panzer Division. According to Gregory Blaxland, the 6th Panzer Division hit the 6th Royal West Kent at Doullens while the 8th Panzer Division struck the 5th Buffs and 70th Brigade. The speed and tempo of the German advance simply could not be matched by the French and British response.
The 5th Buffs 6.5-mile defensive line, Doullens, on N25 main road, Northern France, map not to scale.
Those men who avoided immediate capture by the Germans hid in a cabbage field near a train station, and then started marching south towards Amiens. The remnants of the 5th Buffs and 6th Royal West Kent fell back on the Somme in small groups.2
During the brief fighting at La Herliere, Arras Railhead, John mentioned the brave and defiant actions of Private John Arthur Lungley (Service Number: 6584460), B Company, 5th Battalion, The Buffs. Lungley refused to surrender and kept firing his Bren light machine gun until the Germans brought up a tank to deal with him. Lungley is buried in La Herliere Communal Cemetery, France.3
Initially, Lungley was buried in the hole from which he fought. The French villagers, in defiance of the Germans, would lay fresh flowers on his grave every night. When the villagers decided to rebury Lungley in the local cemetery, the event caused such unrest, the Germans stopped the ceremony. Instead, he was quietly reburied at night but the villagers never forgot his stubborn defiance or his sacrifice.4
John’s personal notes, Monday 20 May 1940
We moved out of the seminary in Doullens just after dawn and were taken by company trucks to Le Brey Saute. The company commander, Captain Hart and his second in command (2IC) Captain Rawlins gathered the NCOs (Non-Commissioned Officers) and took us forward to inspect the ground ahead for good concealment and arcs of fire. Dispositions having been decided, the company moved forward by platoons and sections and settled into their positions by 09.30hrs.
Officially we had been told that a few AFVs (armoured fighting vehicles) had broken through on our front. In fact, it was the spearhead of 6th Panzer Division. The enemy column advanced up the road toward B Company at around lunchtime, when many of the men were in the rear area visiting the ration truck.
The platoon .55 calibre Boyes anti-tank rifle was manned by No. 1 Section, who opened fire. This gunfire stopped the enemy lead vehicles. After just three rounds had been fired the order was given by B Company commander for all those manning Brens (Bren light machine gun) and ATRs (anti-tank rifles) to retire to the nearby train station, where trucks were waiting to evacuate us.
On arrival at the train station, the Germans brought a heavy machine gun into play, sweeping the station forecourt, where our trucks were situated. Captains Hart and Rawlins were trying to organise a defense of the station. Under heavy fire, I received permission to get boxes of ammunition off the trucks. Shortly after returning to the company, Captain Hart gave the order, ‘Every man for himself.’ At this point it became obvious many of us would become prisoners of war (PoWs). I decided to try and get away and contact one of the other companies. I managed to get through a barbed-wire fence and across a railway embankment without being spotted by the Germans.
Crawling into a cabbage field, John came across Captains Hart and Rawlins and several NCOs from the company who had also evaded capture. They watched while the Germans used the company’s own trucks as prisoner transport. The group of escapees moved west until they came across a road filled with a constant flow of German vehicles. Hidden at the roadside, the group waited about an hour for a break in the traffic and eventually decided to change direction and move south and try to reach the Maginot Line.
Tuesday 21 May 1940
John’s group of fourteen men moved south across-country. They were provisioned by the generosity of local French inhabitants. Captain Hart was able to draw up a route of march for the group by copying a map provided by a French villager. The group observed endless columns of German vehicles on all the major roads. Captain Hart’s route would take them south and then southwest to Les Andelys.
Wednesday 22 May 1940
On leaving the village where they had received help, the group moved cross-country once again, avoiding main roads. They crossed a field crisscrossed with tank tracks and discovered the bodies of several dead French soldiers laying in a ditch.
Saturday 25 May 1940
The men became separated into two groups while crossing a road during a brief gap in the German traffic. The two groups were never reunited.
Sunday 26 May 1940
John’s group moved toward the river Somme. German artillery had the far bank of the river under fire with shells passing over the heads of the men.
Monday 27 May 1940
John’s group decided to try and cross the river to reach the Allied side. However, the group were surprised by a German sentry and taken prisoner. The group was transported to the German company headquarters, where they gave their names, ranks and serial numbers. Captain Hart was separated from the other ranks. The group was moved by truck to Albert. Next, they were taken to a French aircraft factory and put under guard outside one of the hangers. John recalled how the group of British prisoners became an object of curiosity to passing German troops.
In general, the Germans were either friendly or indifferent to the British servicemen. One German soldier (sometimes referred to as a Landser) stopped to chat with the group in English, and even shared his rations with them. At around 14.00hrs the group was transported toward Bapaume. At about 17.30hrs the group was moved by lorry to Cambrai, where they spent the night at a barracks, sleeping outside on the parade square.
Map of the Principle British and Dominion prisoner of war camps in Europe, 1944,
British Red Cross, Museum & Archives.
Tuesday 28 May 1940
John’s group were taken to Charleville on the river Meuse. Later, they were driven to Bitburg, north of Trier, where they were forced to camp in the open for five days.
Monday 3 June 1940
The prisoners were taken to a railway siding and loaded onto cattle trucks. John was appointed the NCO in charge of his truck, which was overcrowded with around 70 men. John believed the cattle trucks should have accommodated no more than 40 men. From Bitburg the train took them northeast to Koblenz, north to Bonn, Cologne, Dusseldorf, Duisburg, Essen, east to Kassel, northeast to Magdeburg, Berlin, east to Poznan, and finally northeast to Thorn (Torun), Poland. John simply described the journey as long and uncomfortable.
The prisoners were held at Stalag XX-A (Fort 12, Camp 13) until sent to work in Danzig on 25 June 1940.5
Notification that John was interned as a prisoner of war, June 1940.
25 June – 25 August 1940 – Danzig (Gdańsk)
John was rather vague in his description of the camp at Danzig. Using information on the Forces War Records website, John was probably moved to Stalag XX-B Marienburg, Danzig (now Malbork Poland). Originally built during the First World War, the camp was in a poor condition by the time British, Poles and Serbs were held there in 1940. He does say the camp was built on a hillside overlooking the harbour.6
During the second week at the camp, John became friends with Ted Lancaster, Bert Johnson (Sherwood Foresters) captured in Norway, Lance-Corporal Bill Bailey (King's Own Yorkshire Light Infantry) also taken in Norway and Sergeant Bill (Darkie) Jones (Royal Signals) captured in France. Together, John and his new group of friends planned to escape from the camp.
The escape was scheduled for 25 August 1940. The men were provisioned by the camp’s escape committee. Having cut a hole in the perimeter fence, the group slipped out of the camp. The poor upkeep of the camp might have made the group’s escape easier. They climbed up a slope covered with undergrowth and emerged in what appeared to be a public park with many people enjoying a Sunday stroll. The men remained hidden in the undergrowth until dark. Ted had managed to keep a compass hidden on his person. They spent the next few days moving at night and laying up during the day.
29 August 1940
The escapees passed out of the Free State of Danzig. Next day they turned east towards the Russian frontier.
5 September 1940
The group reached the banks of the River Vistula just before midnight but it was too wide to swim across. They found a small rowing boat with just a single oar, and managed to cross the fast-flowing river, which John estimated was about a mile distance.
7 September 1940
Moving along the back of a row of houses, a German policemen apprehended the group at gunpoint. The group had allowed themselves to be seen by several civilians during the previous days. Additionally, just before their capture, two of the group had stopped to ask a resident of the village for cigarettes. The men might not have realised it at the time but around 95 percent of the population of the Free State of Danzig were German, not Polish, and so likely to inform the authorities about them.
On re-capture, the group was transported by truck to a German military prison before being sent back to Danzig by rail. The journey took around three and a half hours by train. It had taken the men 14-days to cover the same distance on foot. To add insult to injury while at Stalag XXA, Camp 13, John and many other prisoners contracted lice.
September 1940 – April 1941 - Stalag XX-A (Thorn/Torun)
On their return to Stalag XXA, the escapees were first kept together in a cell, separated from the other prisoners, for about three weeks. As a punishment for their escape each man would be kept in isolation for 68-days. However, before the punishment was carried out, John was taken ill with suspected Diphtheria (a serious bacterial infection which can cause breathing problems, heart failure and death). He was sent to Fort 14, the camp hospital, and confined there for four weeks. On discharge from hospital, John was sent to Camp 13 where he was placed in a large barracks with hundreds of men, all sleeping in cramped three-tiered bunks.
Suddenly, without warning, John and about 100 other prisoners, all escapees, were transferred by rail and then road to Stalag XI-B Fallingbostel (work camp).
April – July 1941 - Stalag XI-B Fallingbostel (work camp)
Stalag XI-B was one of the Wehrmacht's largest prisoners of war (PoW) camps, holding up to 95,000 prisoners from various countries. In fact, the camp was a complex of small camps spread over many square miles. Stalag XI-C was part of this complex but is better known today as the infamous Bergen-Belsen. The new arrivals at the camp showered, had their heads shaved and uniforms disinfected. John wrote that the camp was clean and well kept. The British prisoners were quartered with a group of French junior officers. The two groups immediately started to plan an escape. However, John’s group were separated from the Frenchmen a few days later and assigned to work parties.
John’s work party was given the task of laying pipes for an agricultural irrigation system. Over a period of a few weeks several men took opportunities to escape. However, most of these escape attempts were spur of the moment decisions and poorly planned.
May – June 1941 – Stalag XI-B - Lüneburg Heath, north of the camp
As John’s work group received no food from their German captors, they decided to go on strike. The guards threatened to shoot the prisoners if they did not go back to work. After a tense standoff between the two groups, the prisoners finally returned to work. As a punishment for refusing to work, John’s group were confined to their quarters without food for five days. It later emerged that the reason the Germans had not fed John’s work party the day of the strike was because it was the Whitson holiday. The guards had planned to return the work party to the camp early and allow the men a half-day holiday. Instead, on release from their confinement, John’s group were immediately transferred out of the camp and sent back to Poland.
Stalag XXI-A, Schildberg, Posen
On arrival at the new camp, John found many of the prisoners were recovering from wounds and some were awaiting repatriation to their home countries. After a few weeks, John and his comrades were assigned to a work party but discovered that it was war work, which was a violation of the Geneva Convention. Naturally, the British refused to work. Once again, the group was threatened with loaded rifles by the German guards but this time they did not back down. Instead, the group was returned to the camp.
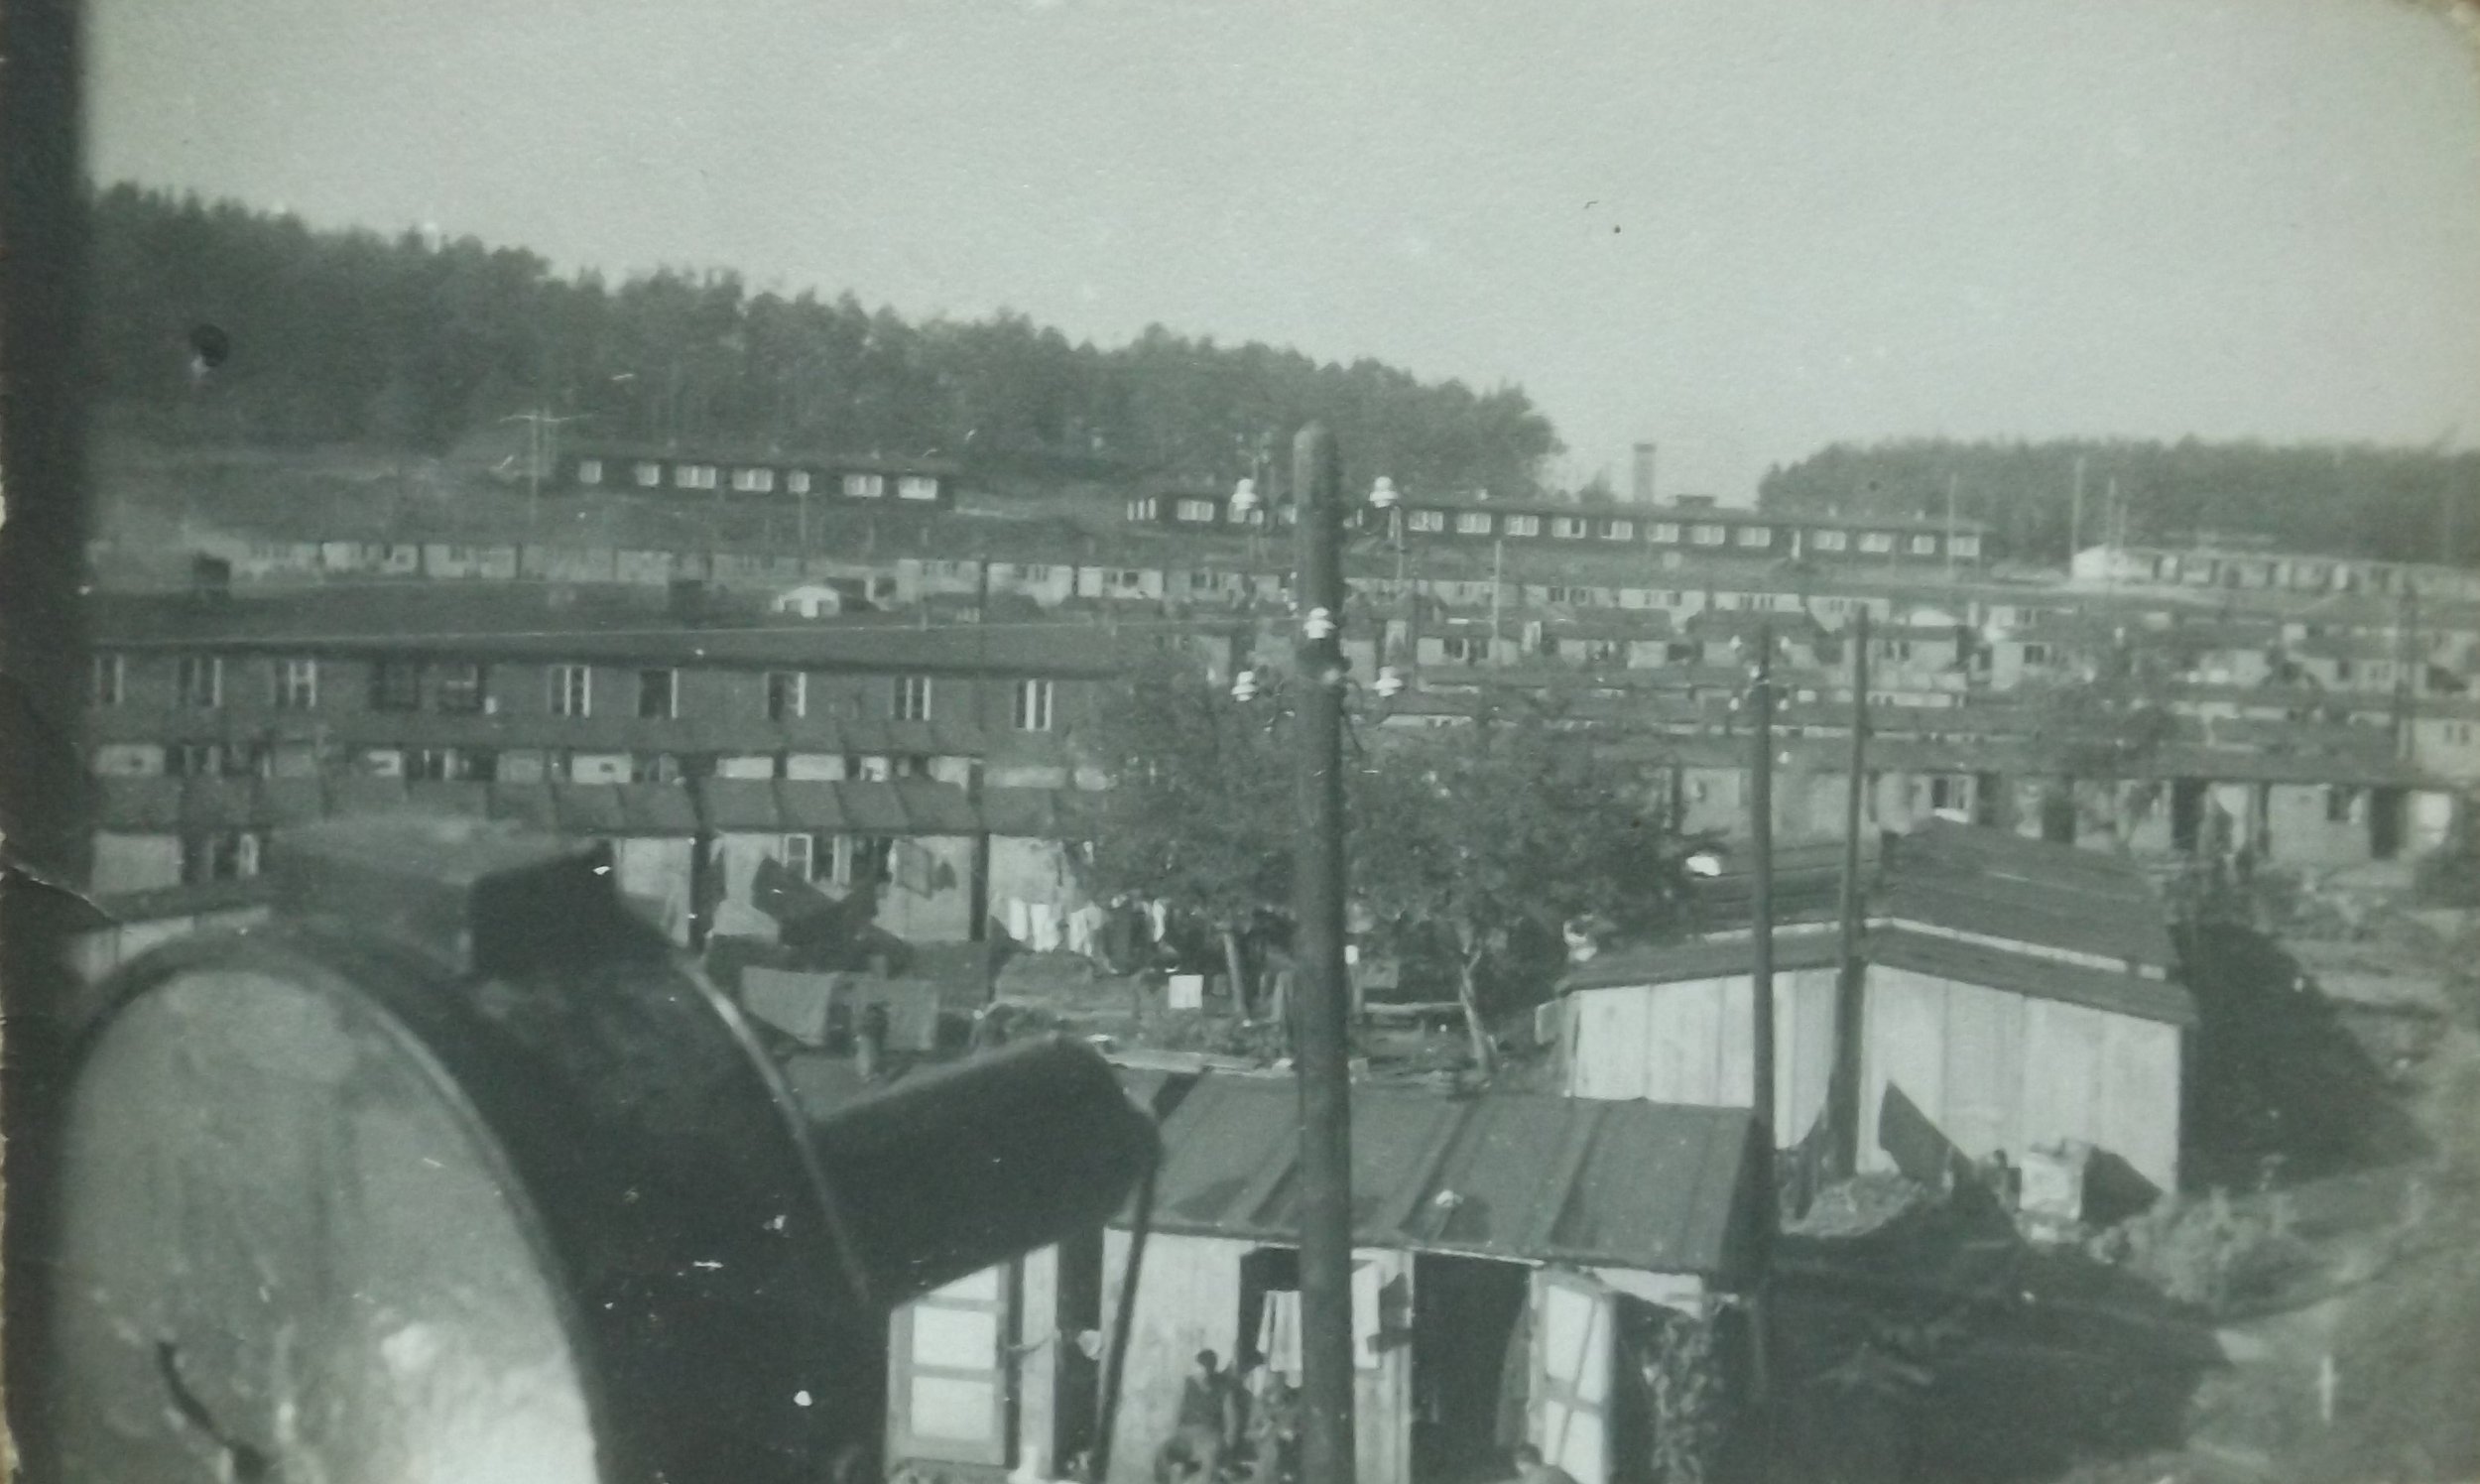
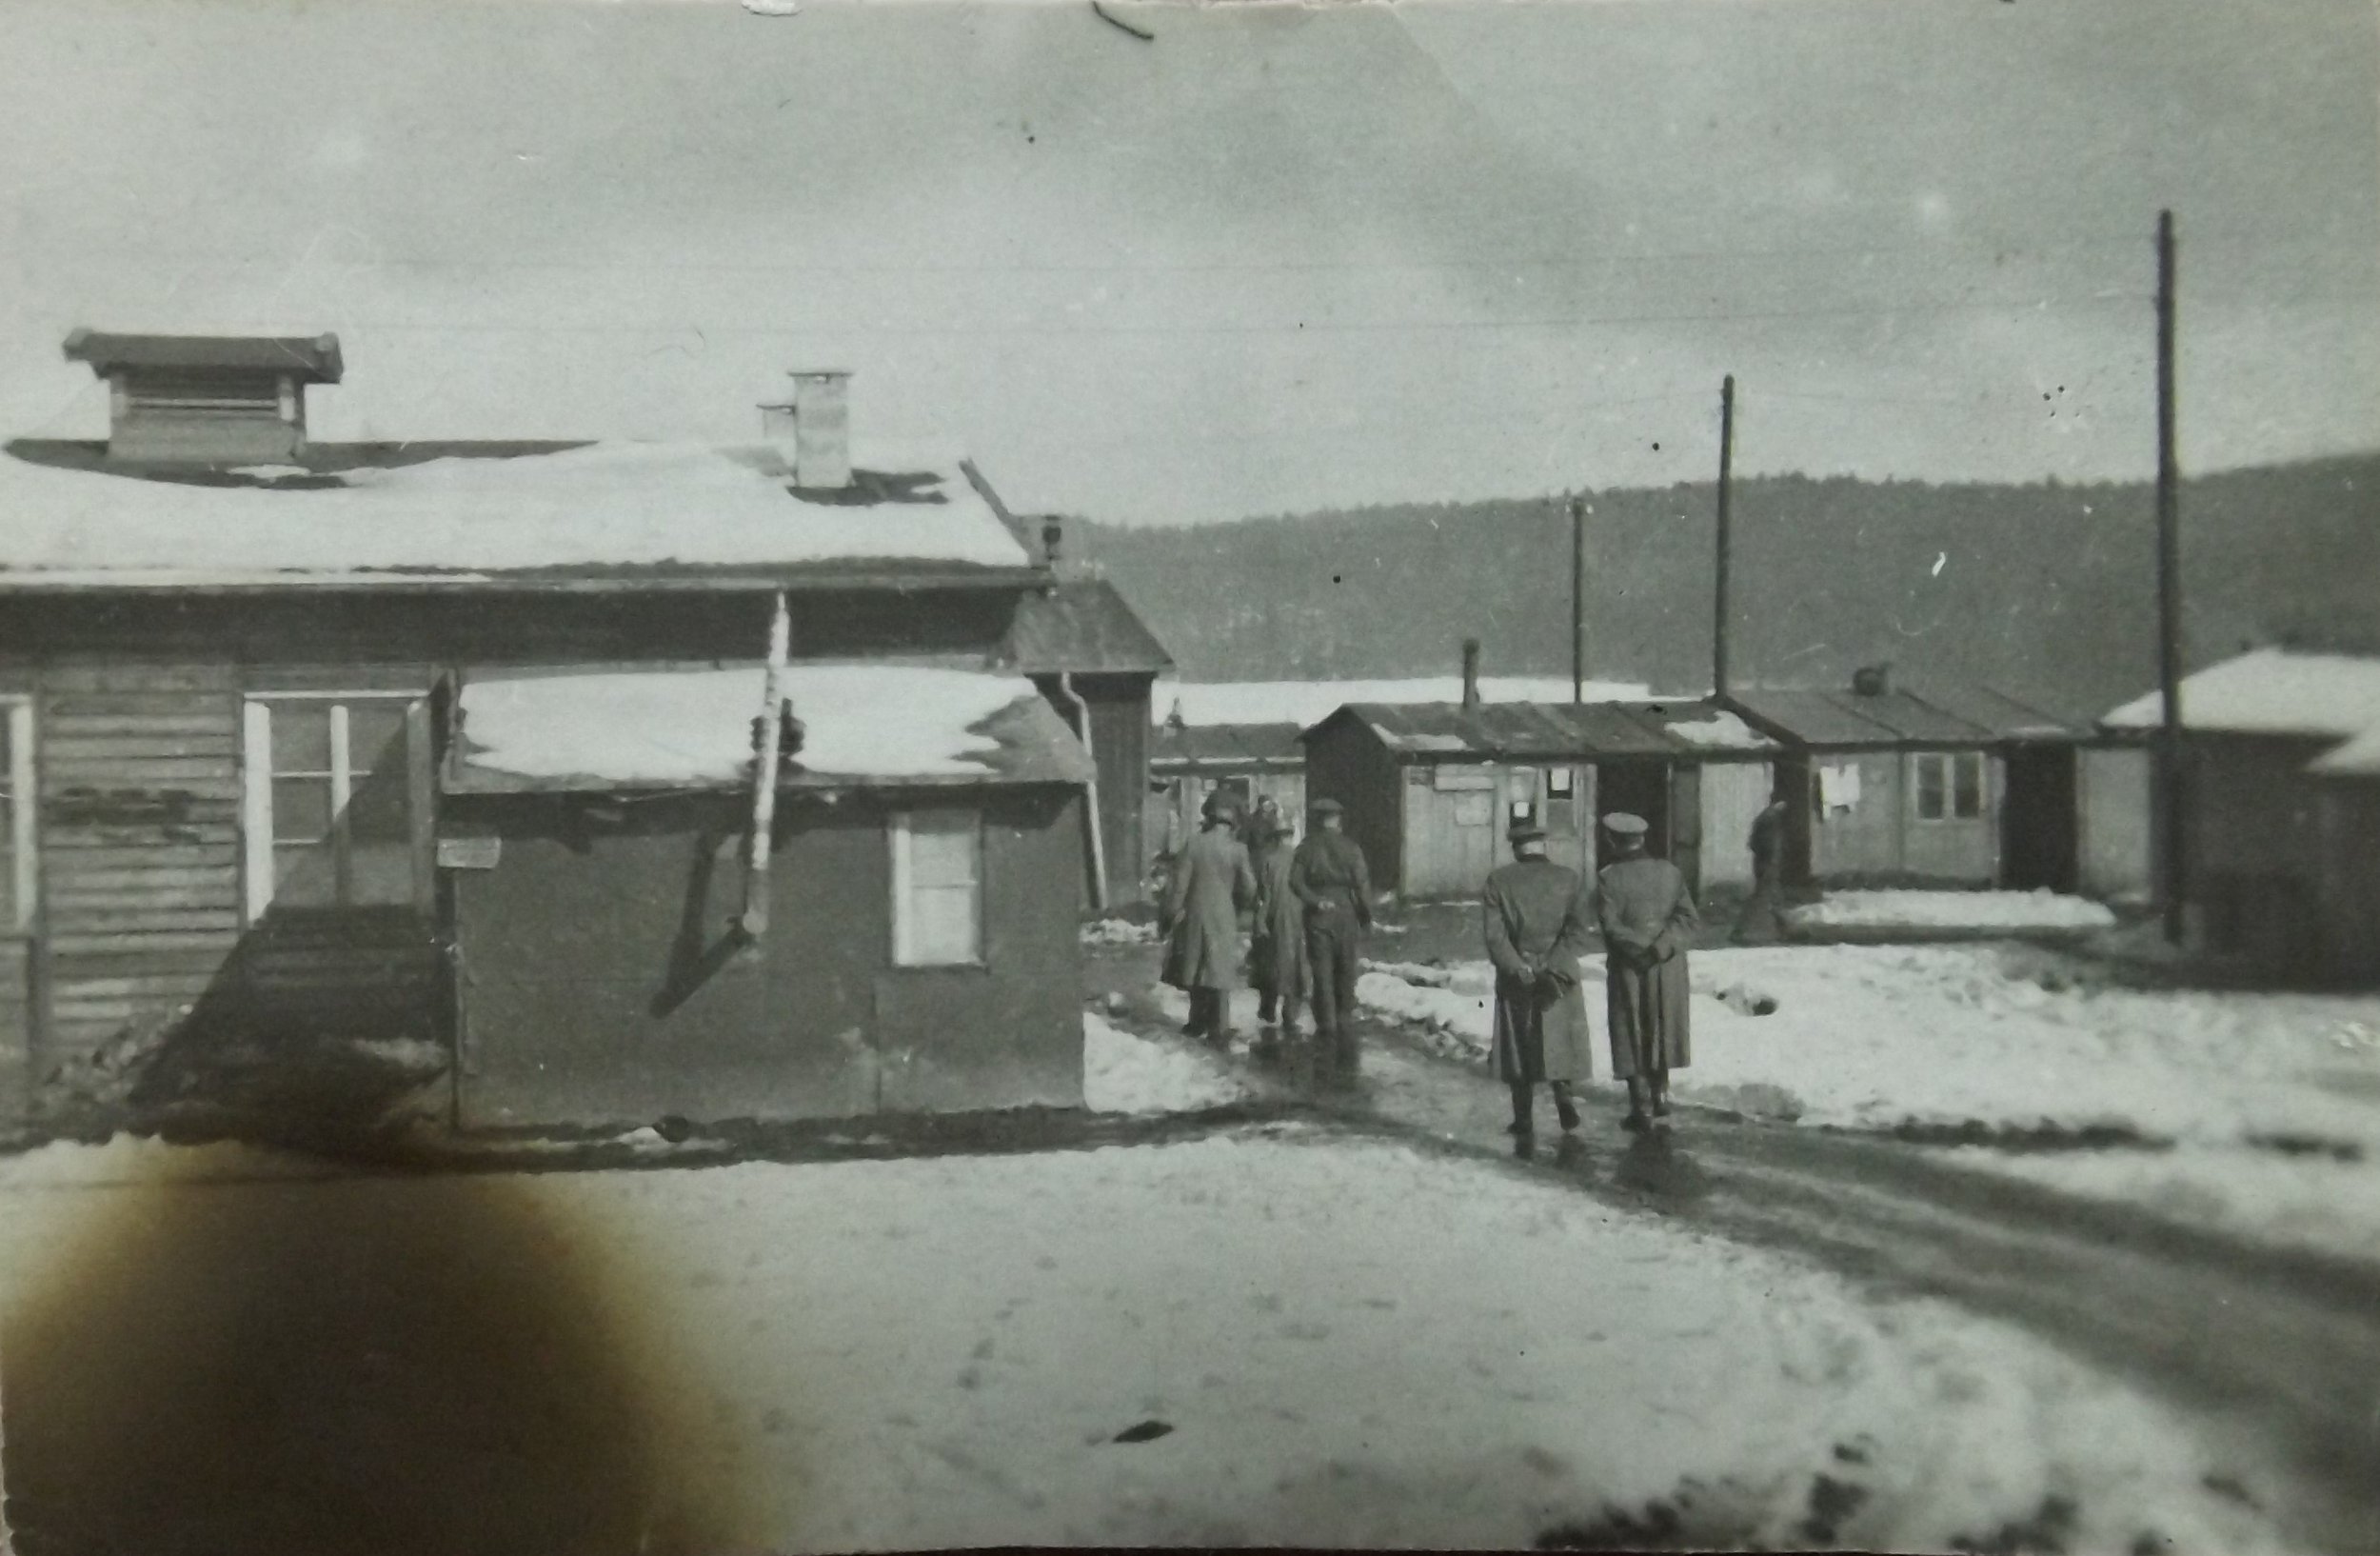
July 1942 – April 1945 – Stalag XXI-A – Oflag III-C later renamed Stalag 383, Hohenfels, Upper Bavaria.
The camp comprised 400 detached accommodation huts, each typically housing 14 men. More were built towards the end of the war as prisoners were moved in from other camps as the Russian front advanced from the east. According to John’s testimony, when the British group arrived at the camp there was around 3,000 prisoners including RAF aircrews. When the camp was evacuated in April 1945 the number of inmates had grown to around 18,000 Allied personnel including Americans, Canadians, ANZACs, South Africans, Palestinians, and men from many other commonwealth nations.
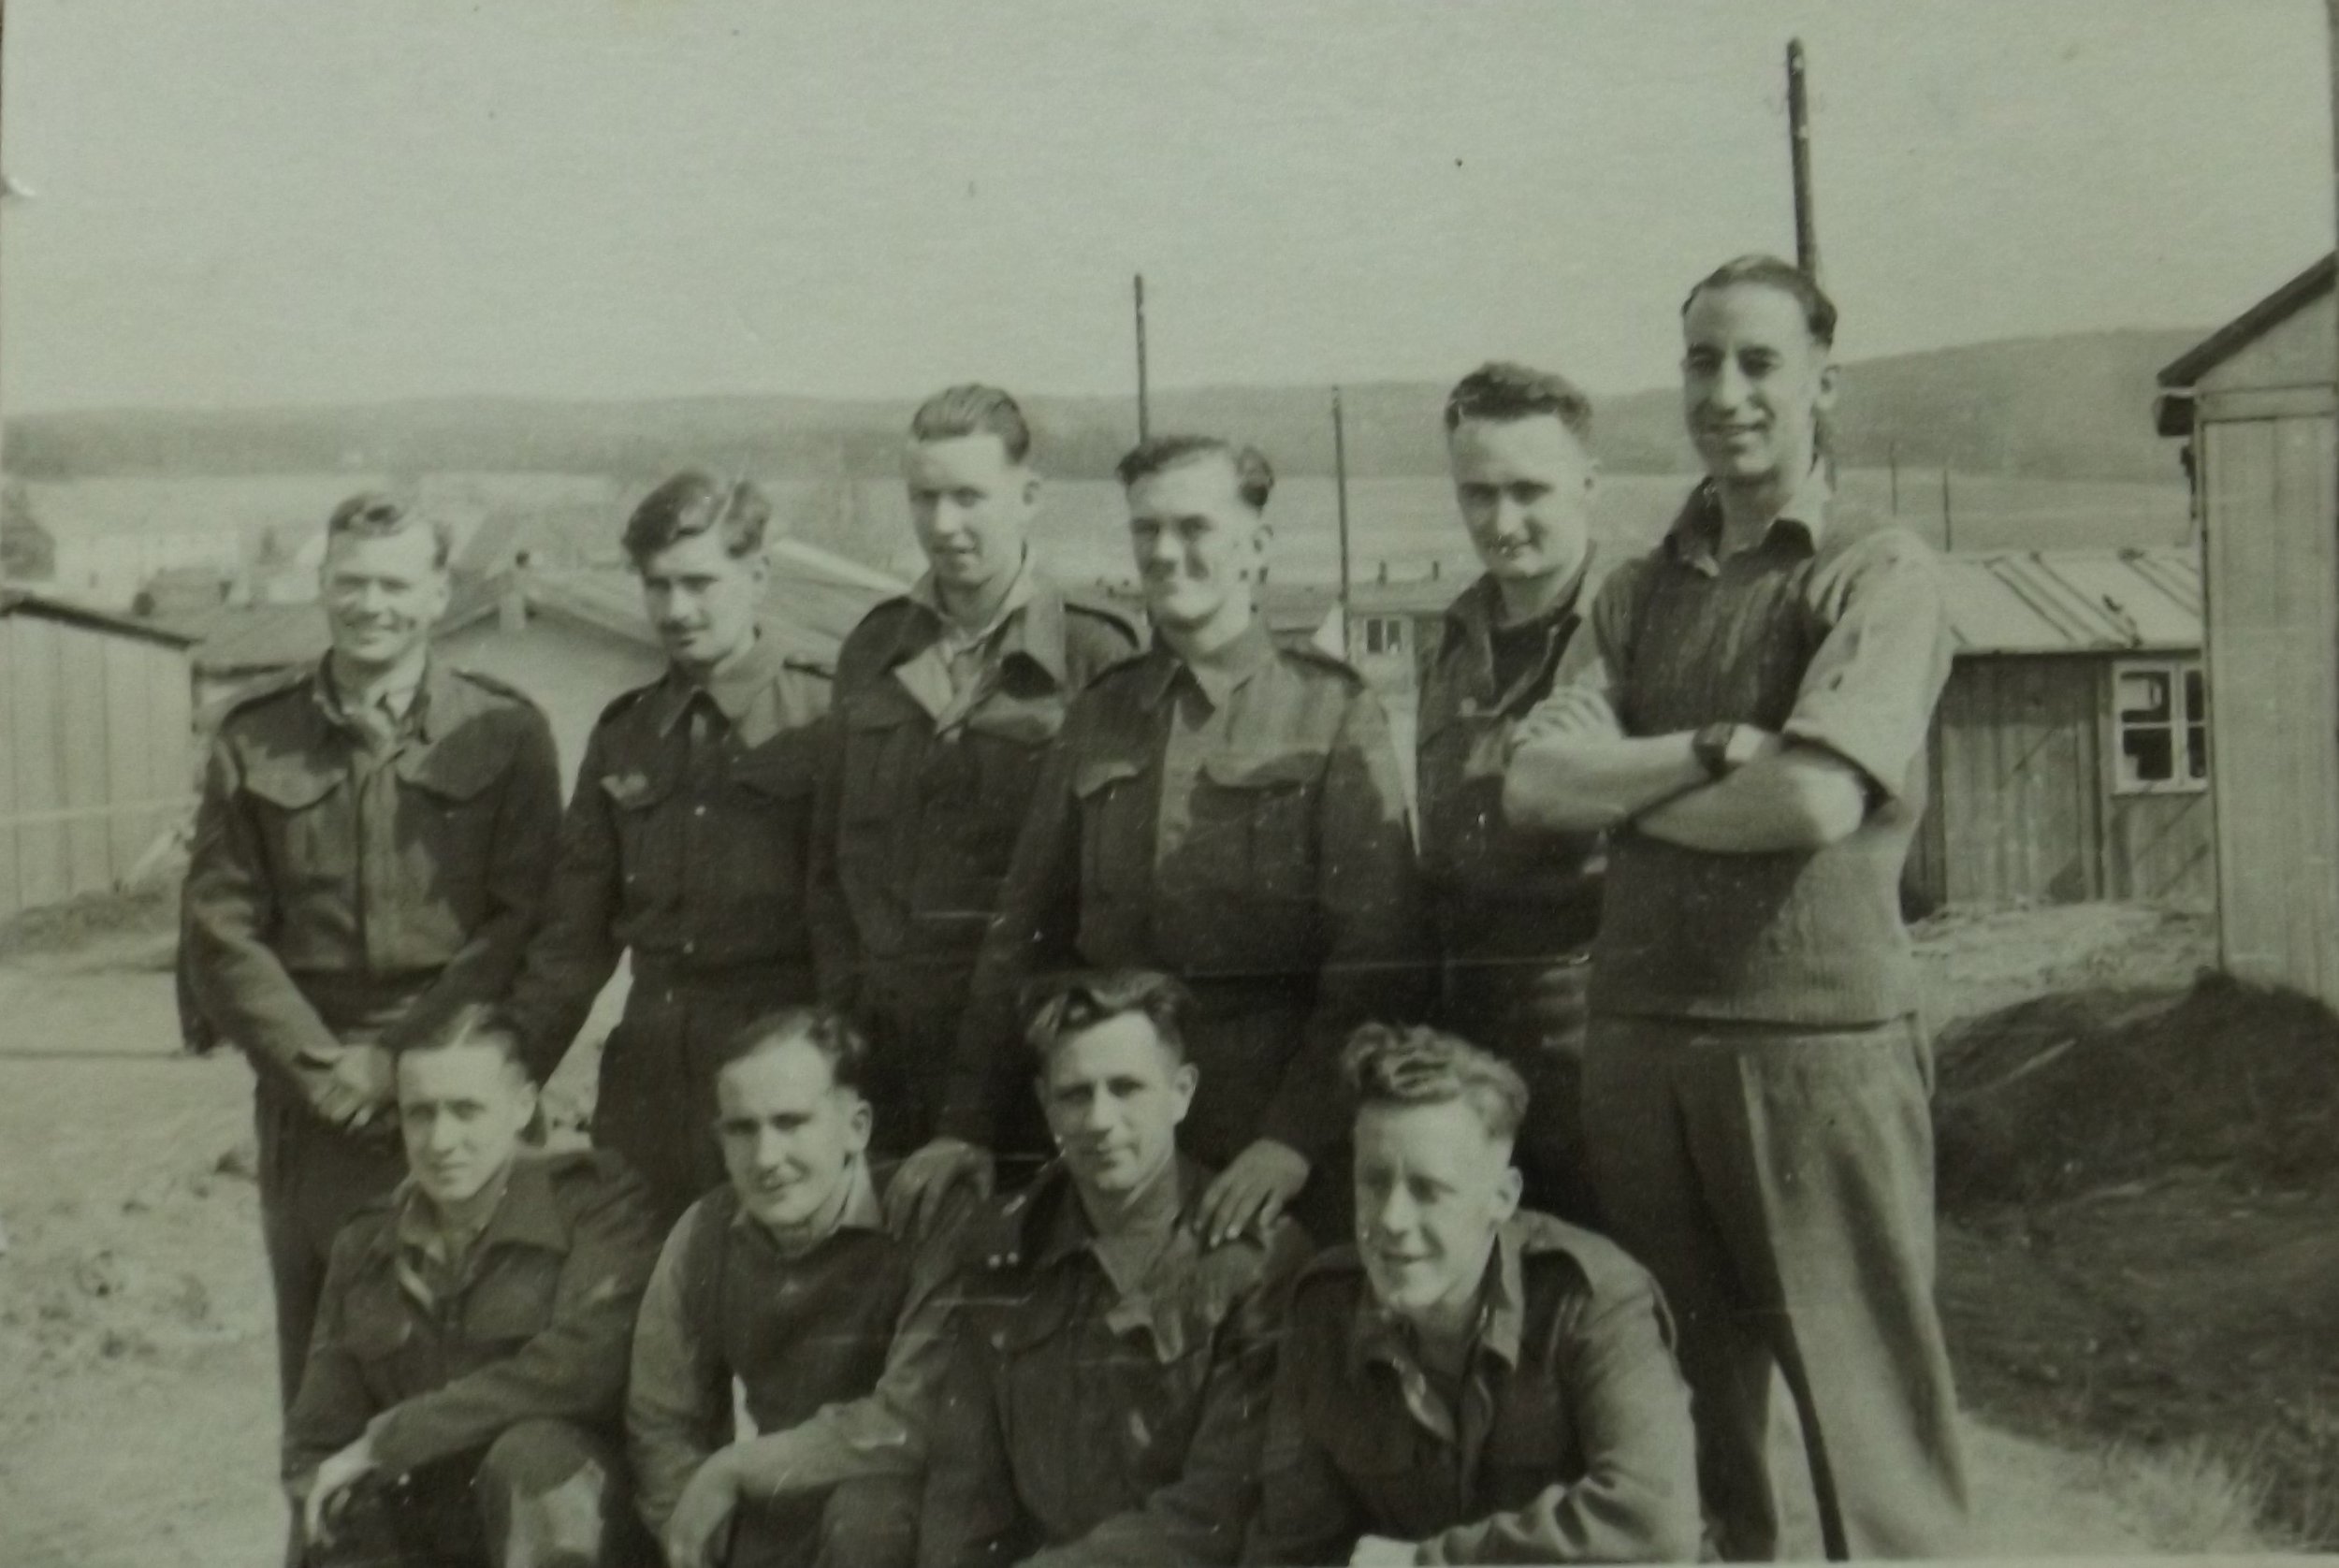
Midge Gillies described Stalag 383 as a drab, miserable shanty town designed specifically to hold Allied NCOs who refused to work. The prisoners retained a great deal of autonomy in the organisation and running of the camp. A German censor at the camp wrote that the British prisoners did not give a damn who owned the camp, they just ran it how they liked – and patronised everybody. One of the PoWs said that the guards assumed the status of attendants at a holiday camp. In truth, the prison was no holiday camp for the inmates.
Mental Stress
The mental stress of incarceration showed itself in different ways in British prisoners of war. The camp inmates of Stalag 383 occasionally went ‘Stalag happy’ and performed the most bizarre and elaborate charades to occupy and entertain one another. Strange behaviours demonstrated by groups and individual inmates included holding a full-scale fox hunt through the camp and the setting up of an imaginary railway service to England. Inmates dressed as the Emperor Napoleon, Admiral Lord Nelson, and a tribe of North American Indians. One prisoner regularly walked an imaginary dog, another herded imaginary sheep while a third rode his imaginary motorcycle around the camp.
The Commandant of Stalag 383 became so concerned with the mental health of the prisoners that he suggested to the Senior British Officer of the camp that some men could take walks under parole outside the camp to alleviate the symptoms of stress.7
Food Scarcity
In 1944, there were about 90,000 British prisoners of war held in Germany or camps in occupied territories. In contravention of the Geneva Convention, which required the Germans to feed prisoners a basic, balanced diet, the men never received proper rations from their captors. The British Red Cross, St. John War Organisation, YMCA, and International Red Cross worked tirelessly to ensure prisoners were able to receive food parcels from home. Instead of luxuries, food parcels became necessities, supplementing the prisoners’ poor, unbalanced diet. However, the Germans were meticulous in the delivery of Red Cross and similar parcels, making them a top priority for the transport system.
Over the course of the Second World War, the British Red Cross sent around twenty million food parcels from the UK to British Prisoners of War scattered around camps in Nazi-occupied Europe and in the Far East. Around 163,000 parcels were packed each week except at the start and toward the end of the war.8
As well as food, the British Red Cross and St. John War Organisation sent clothing, books, musical instruments, games, and many other sundry items to British captives. It’s clear that a certain amount of pilfering was done by the Germans, nevertheless, most items did eventually reach their intended destination. Naturally, lack of food, over-crowded accommodation, inclement weather conditions, and disease all took their toll on the prisoners’ health and mental well-being.9
Prisoner of war food parcel, 1939-1945, British Red Cross, Museum & Archives.
The Rover Scouts
On 15 September 1942 the first British NCOs arrived at Oflag III-C. The British were placed in the camp because they were unwilling to work for the Germans. On arrival at the camp prisoners tended to form into groups based on nationality, branch of service or some common interest. One of the first groups to form in the camp was of people connected with the Scout Movement in civilian life.

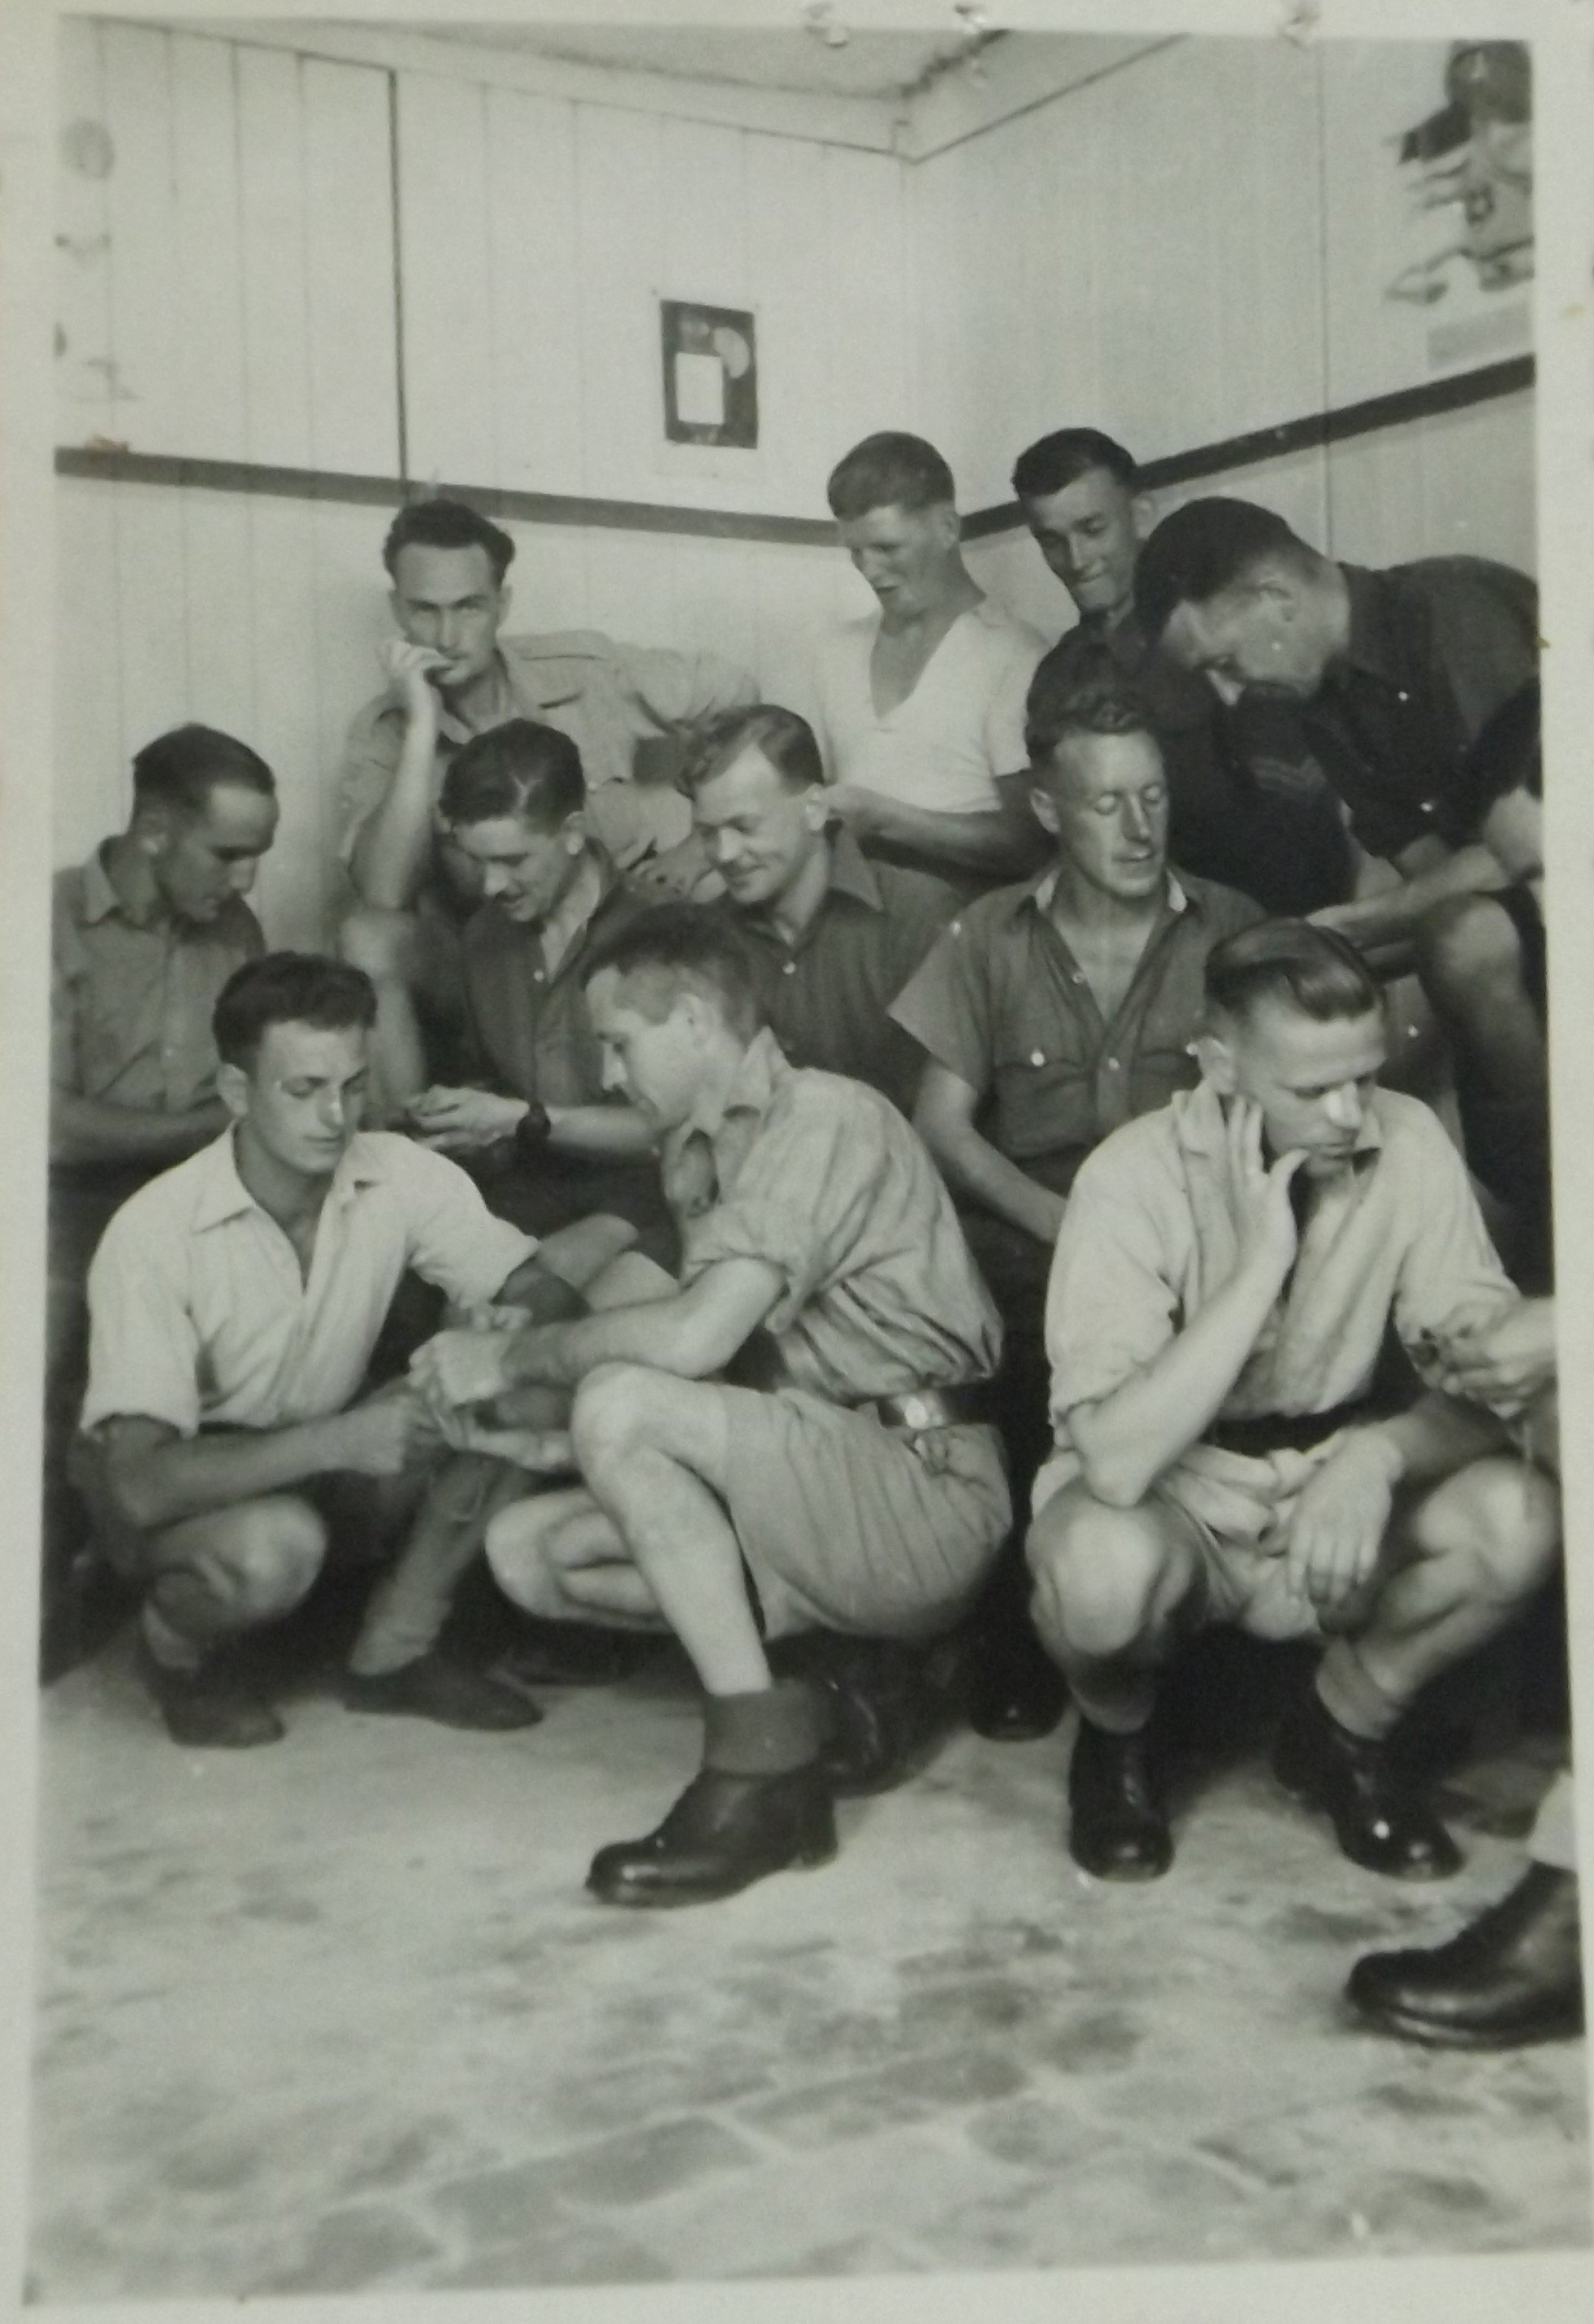
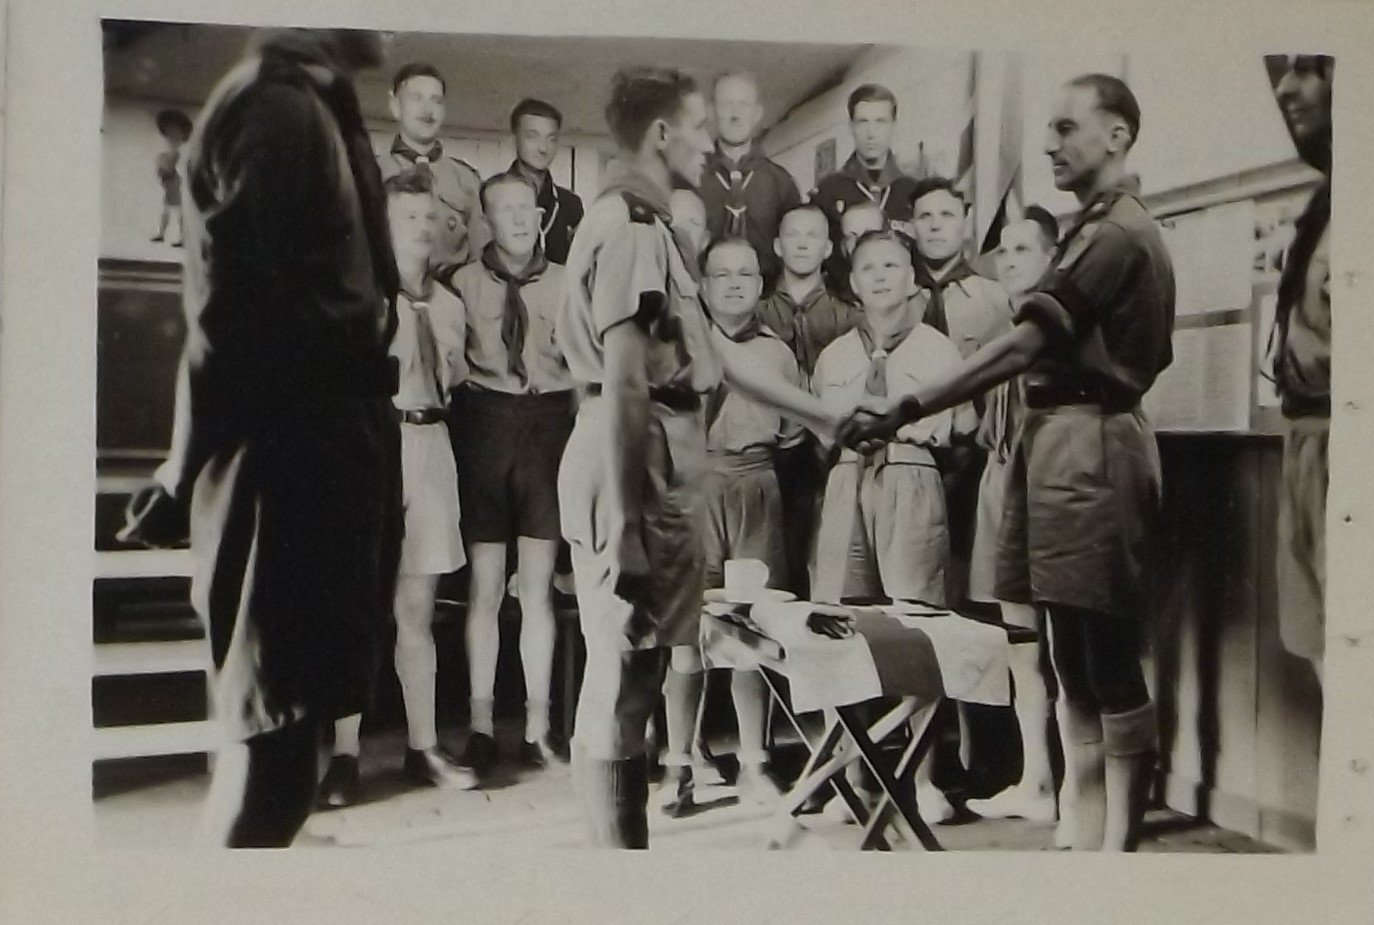
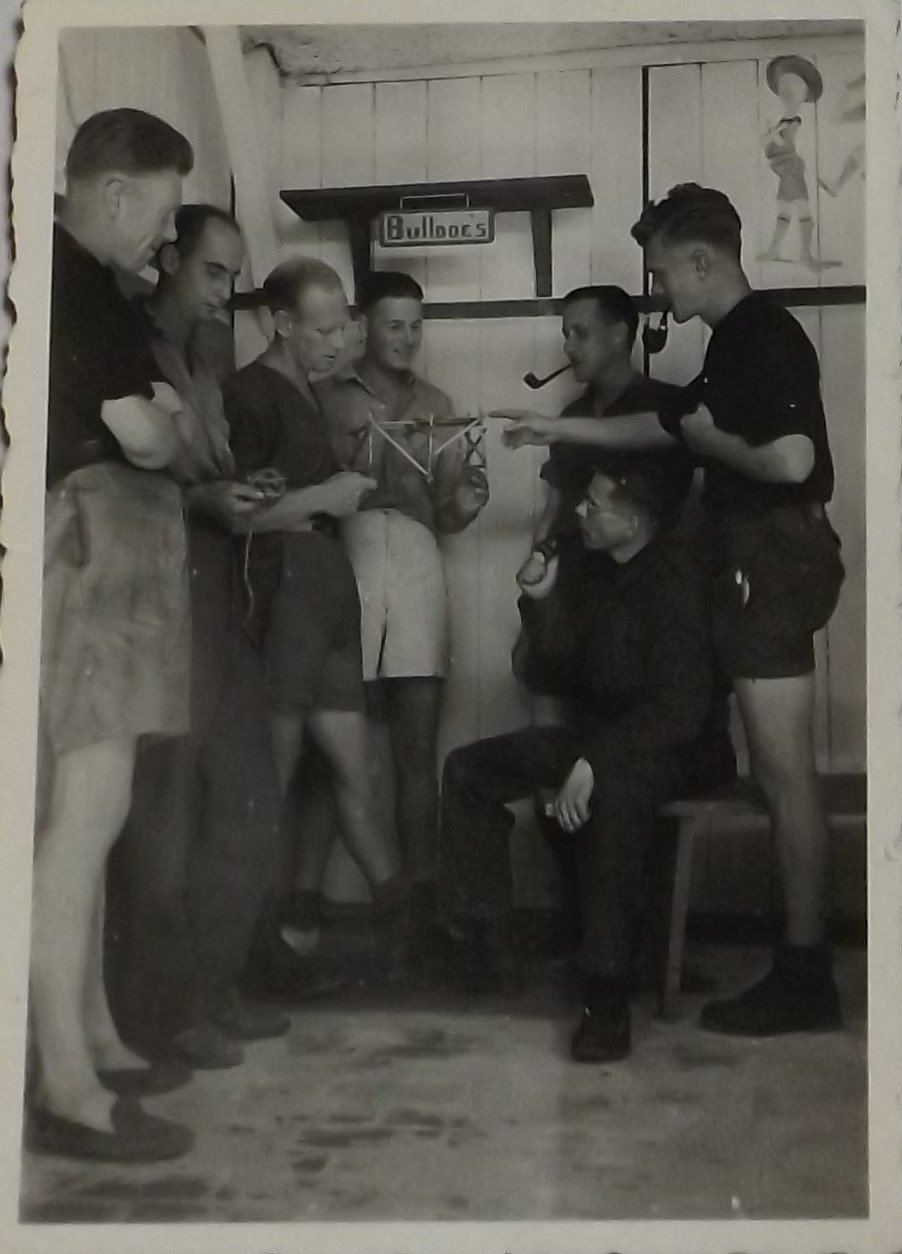
In October 1942, a group of British and commonwealth prisoners decided to form an official Rover Scout Crew, which they named Richard Coeur-de-Lion (Richard the Lion Heart). The Scout Leader was Australian warrant officer Ivan C. Stevens, better known as Steve. John was appointed Quartermaster. The crew was divided into three patrols: the Bulldogs, Nomads and Owls. An old harness room in one of the disused stable blocks became the scout Den and was later used as the camp school room and library. As suitably quiet accommodation for study was extremely limited in the camp, the Den was opened as a ‘quiet room’ for those seeking solitude. A member of the scout crew would always be in attendance when the Den was open.
The scout crew took on many of the mundane chores necessary to keep the camp functioning such as collecting firewood. The scouts organised numerous activities to keep its members and other prisoners busy from debating societies and amateur dramatics to sports and various self-improvement classes. First Aid classes were taught by the scouts until a St. John Ambulance Brigade was formed in the camp. The Brigade performed medical duties at all camp football matches and theatre performances. Members of the scout crew took an active role in the many theatrical productions held at the camp’s National Theatre. The scout crew organised social events such as the annual Christmas party. Holidays like Christmas and New Year could be particularly difficult psychologically for prisoners. Depression could settle on a man; its symptoms so well recognised the prisoners called it ‘barbed-wire disease’.10


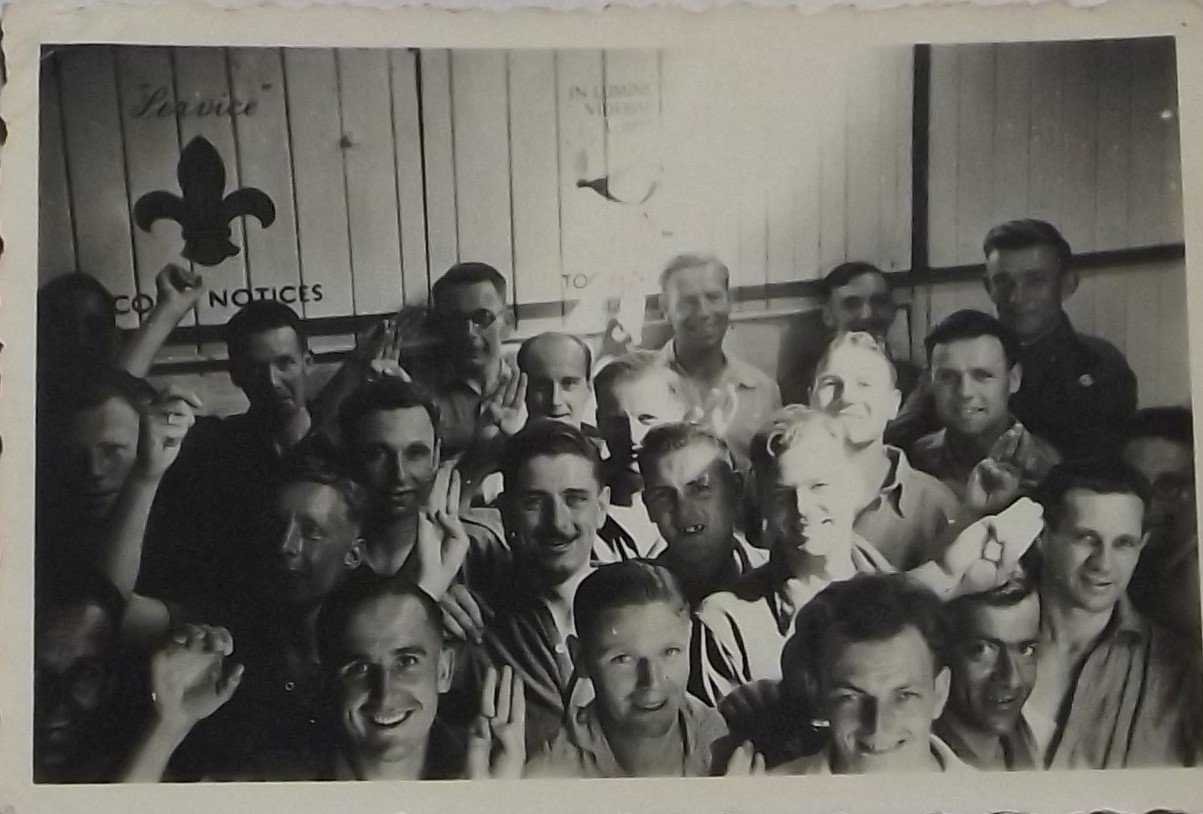
John (marked with an X) during the Scouts last Christmas Party in Stalag 383. John in the Scout Den with some of the crew, Christmas 1944.


Click on images to enlarge
Camp Universities
Francis Newman was the first British serviceman to pass a professional examination in a prison camp during the Second World War. For many men, captivity represented an opportunity to gain an education and qualifications that would have otherwise been denied to them in ordinary life.11 Stalag 383, John said the camp contained so many talented people with nothing but time on their hands that a Warrant Officer (WO) from the Royal Army Educational Corps started a Stalag University. The University taught a wide range of subjects and attracted thousands of students.
The Educational Book Section of the British Red Cross PoW Department was responsible for collecting and dispatching books for study to men in the camps. By May 1942 the Educational Book Section had received 15,355 requests for books and study aids and had arranged for over 69,000 educational books and 3,542 study aids to be sent to the camps, regardless of a wartime shortage of paper. The British Red Cross approved 6,091 different exam papers from 136 different examining bodies from Cambridge University to the Beekeepers Association. The Red Cross also sent rulers, mathematical instruments, drawing boards and chalk. Medical students were sent skeletons and other anatomical specimens to help them pass practical biology exams. The Germans would provide tables and chairs for examination rooms. The Educational Section sent 17,000 exam papers to students who sat around 11,000 exams with an average pass rate of 78.5 percent.12
A collection of photos of a Stalag 383 ‘National Theatre’ production of Rope, winter 1944.
September 1942 – April 1945
As the inmates refused to work for the Germans, they had plenty of time to kill. Subsequently, numerous sports were played in the camp. The inmates even managed to transform a large concrete water tank known as the Fire Pool (which provided a central source of water in the event a fire broke out within the camp) into a serviceable swimming pool. John remarked how during hot days the swimming pool was often crowded with inmates until lights-out. Many aquatic sports competitions were held in the pool and each of the fourteen companies fielded a water polo team. John also helped the camp escape committee but gives no details of his activities in his testimony.
Using clandestine radios, the inmates were able to monitor news broadcasts and follow the Allies advance into Germany during the last months of the war. In early April 1945, the prisoners were informed the camp was to be evacuated.
John, standing, right, probably taken in Stalag 383 as all subjects are NCOs.
12 April 1945 – Stalag 383
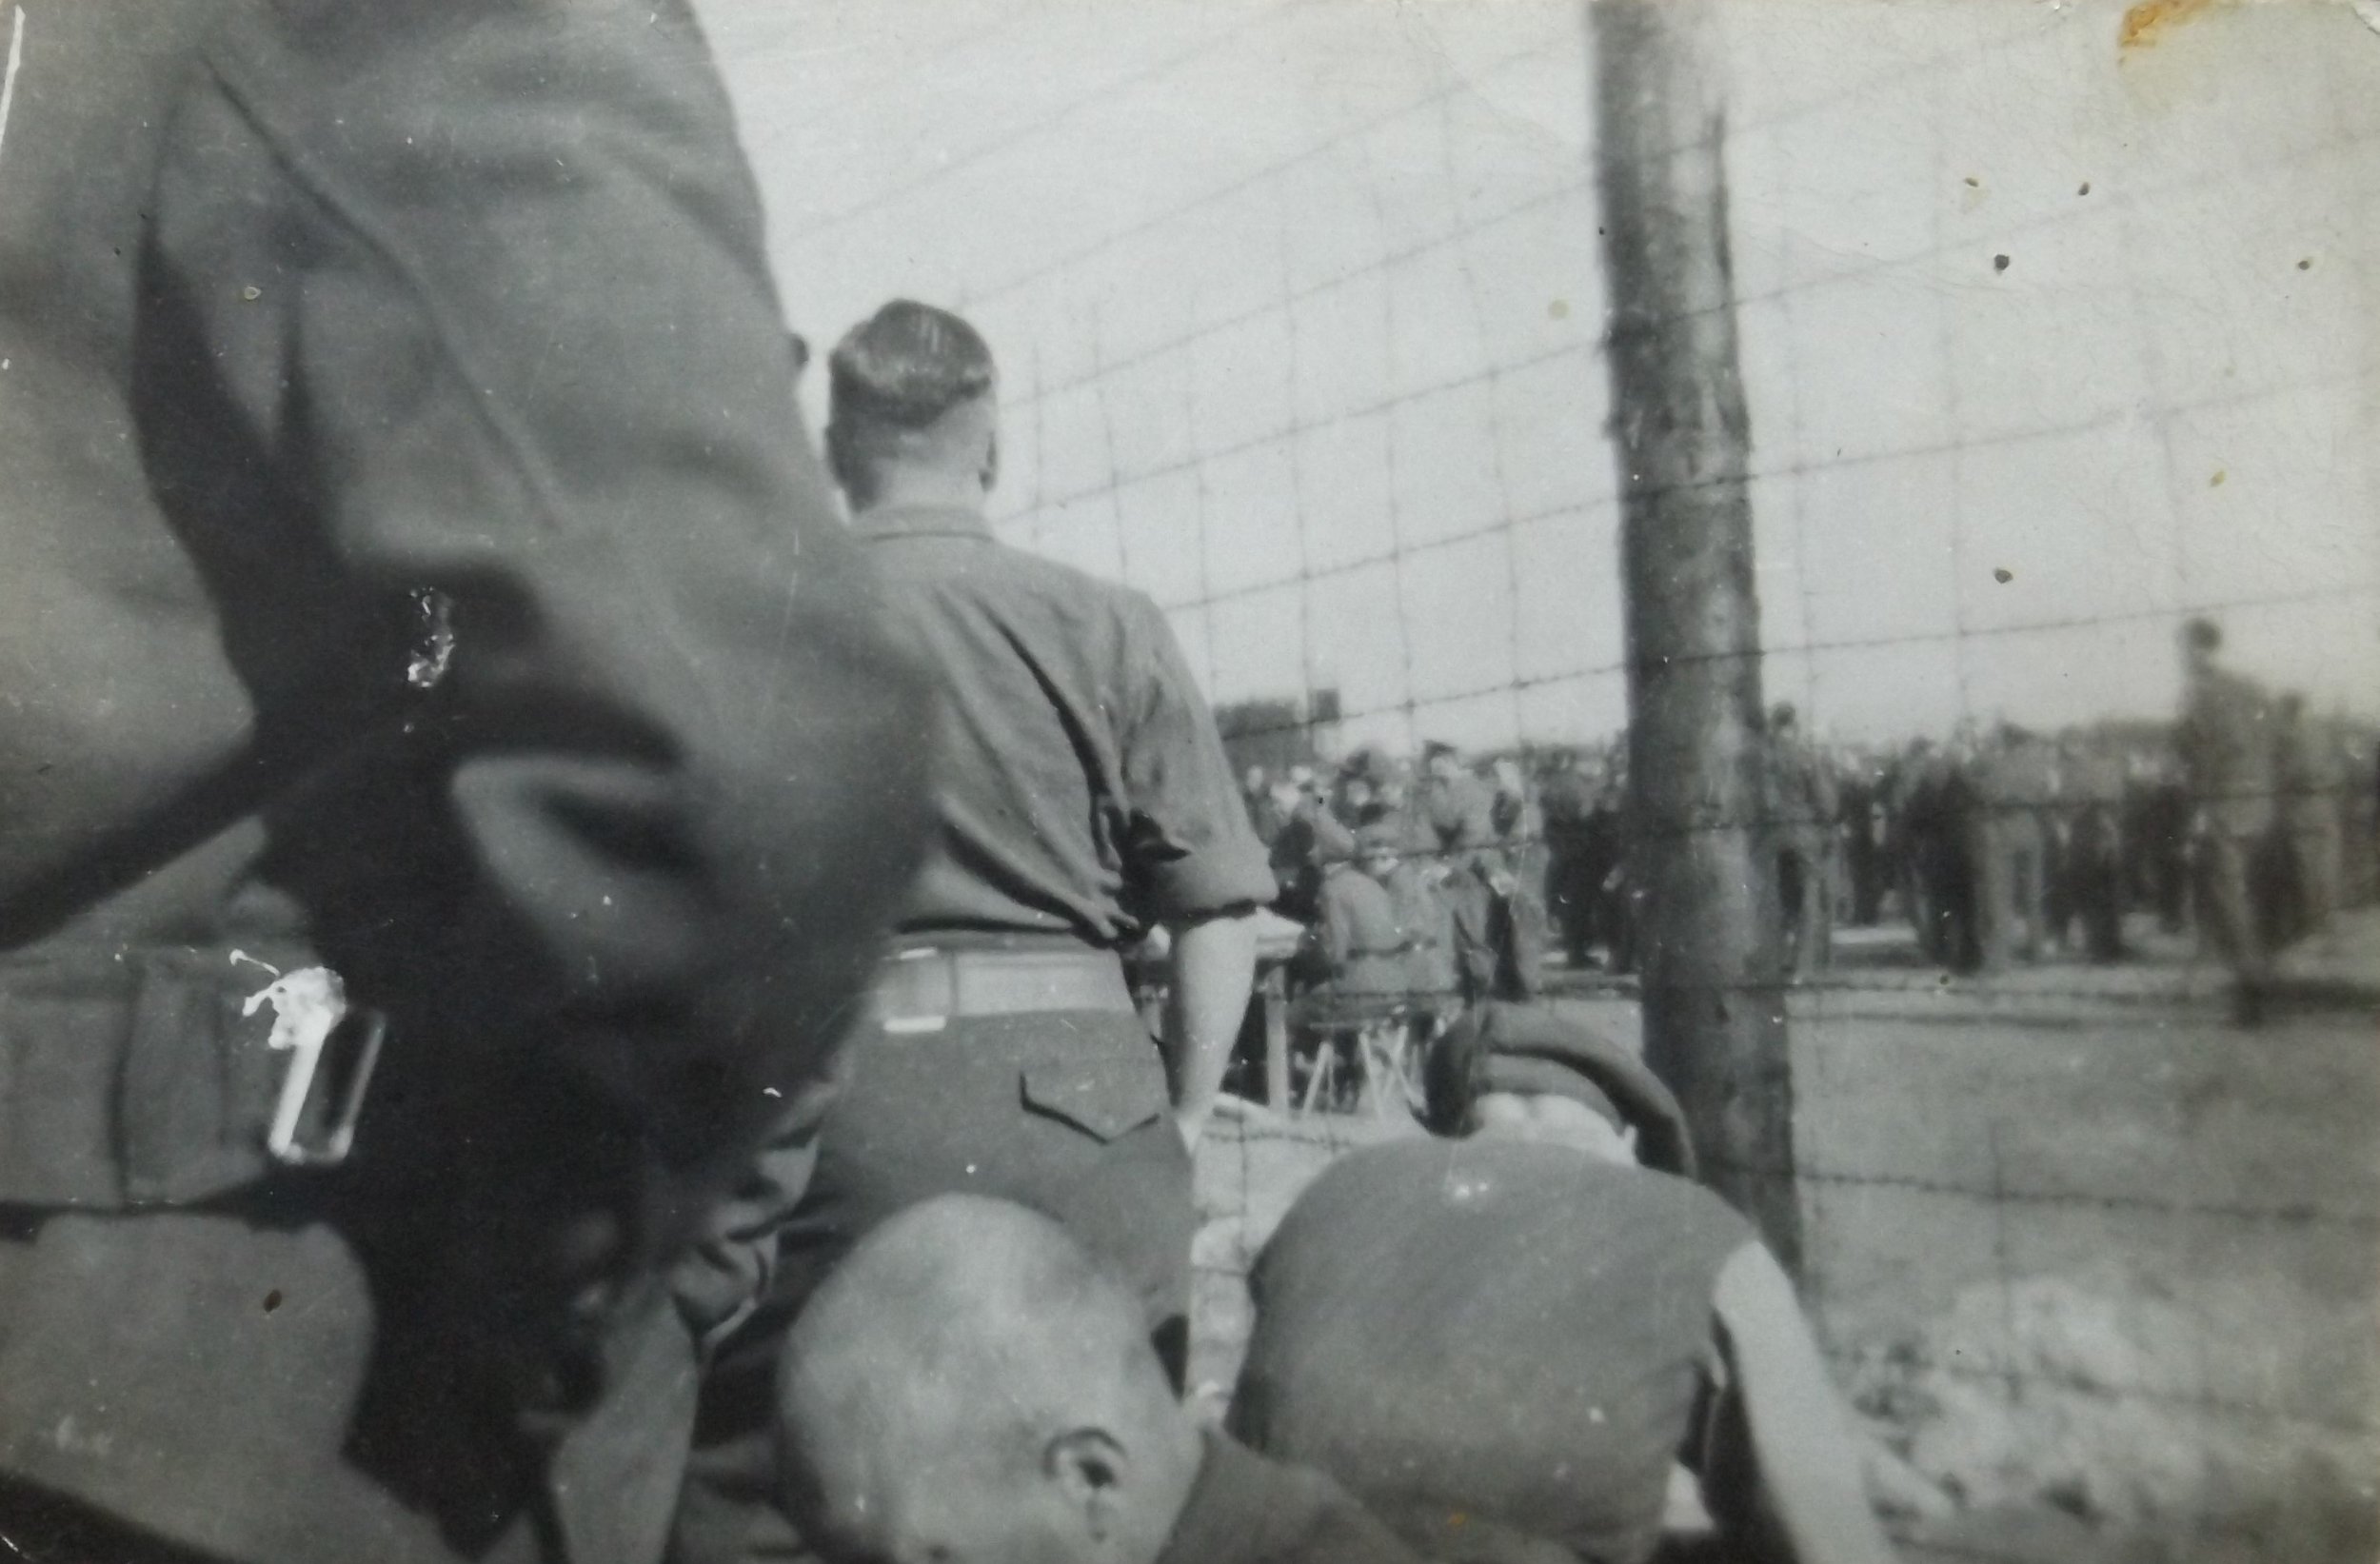
John wrote that on 12 April 1945 the Red Cross white ladies (army lorries painted white and driven by British military personnel (PoWs) accompanied by German guards and a Red Cross representative) arrived at the camp. Red Cross parcels were handed out, one between four men. Next, the prisoners were moved out of the camp and onto a road. John said that whether the men were march-fit, sick, or disabled, it was all the same to the German doctors. Everyone who could be found was forcibly evacuated from the camp. Apparently, many inmates concealed themselves in various hiding places within the camp to avoid the exodus. There was no motor transport for the inmates and by nightfall men were dropping out along the line of march. At first, John explained, the guards would try to rouse the small groups and get them marching again. But later, no one from the camp administration came along when John and a small group of his comrades dropped out for a rest. They took this opportunity to slip away from the forced march.
13 April 1945
Early the next morning John and his friends cleaned themselves up and then moved off in regulation fashion. John recalled that they looked quite smart as they marched along. However, the group were stopped by a German Field Police (Feldgendarmerie) unit looking for deserters. The Feldgendarmerie turned the British over to a small group of German truck drivers who had lost their vehicles when they had been attacked by Allied fighter-bombers. Together, the little mixed group of Germans and British NCOs marched about ten miles to Hohenberg (unfortunately John is a little vague about the exact location but is probably the town between Stuttgart and Nuremberg). The British were handed over to the civil authorities in Hohenberg, where they were given rations and bedding, and remained there for a few days.
14 April 1945
John wrote that at about midday on 14 April, a French soldier called Rene joined their group. He said he had been picked up outside Regensberg, which is east of Hohenberg, after he had escaped from a PoW camp. John remarked that he seemed pleasant enough and spoke good English.
15 April 1945
John and his comrades were put to work around the town but were not closely supervised. During the afternoon of 15 April, a German military motorcycle came racing through the town pursued by an Allied rocket-firing Typhoon aircraft. To try and evade its pursuer, the motorcycle went over a humpbacked bridge at speed and then turned into a large barn that stood beside the road. At the same moment, the Typhoon pilot fired a salvo of rockets. The rider and passenger either jumped or were thrown clear as the motorcycle crashed into the barn. In the next moment, the rockets hit the barn and it exploded. Unfortunately, the barn housed cows and horses. John explained how the nearby towns people and PoWs rushed to the scene and were able to save about seven or eight of the 15 animals trapped in the inferno.
16 April 1945
The next day, after the episode with the Typhoon and motorcycle, the local Bürgermeister (mayor or chief magistrate) sent for the group of PoWs. The Bürgermeister was concerned that the town’s women would be raped when American troops arrived to occupy the town and asked the men to intercede on the town’s behalf. This fear that the town’s women would be raped was probably due to propaganda and stories of widespread rapes and killings of German civilians by Russian troops in the east of the country.
17 April 1945
John recalled that around breakfast time he heard a commotion downstairs and on investigation found Stan “NAAFI” Henson in a car with a group of chaps, all armed to the teeth, from Stalag 383. Henson informed John that the prison camp had been liberated by the Americans. The German doctor who had insisted that all the sick and disabled prisoners be evacuated from the camp had been shot dead. Henson’s group left John and his comrades with arms and ammunition and told them to roundup any German soldiers left in the town. Next, John says they went to see the Bürgermeister and told him that the town’s folk should hang white bed linen from upstairs windows and public buildings to signify surrender. The British NCOs then went around confiscating weapons from those German troops who remained in the area.
Just after lunchtime an American Jeep arrived in the town square. John and his comrades made themselves known to the American troops. The jeep was the point detail or reconnaissance vehicle for the approaching 4th Armoured Division. An American Private asked John if he would sell him the Luger pistol (P08) he was carrying. These were highly prized souvenirs amonst American troops. John said the Private was overjoyed when he simply handed the pistol over as a gift. As elements of the armoured division started to rumble through the town, John and his comrades sat beside the road while American troops tossed them cartons of cigarettes, C and K-rations as they passed.
At dusk, the group was transported by the Americans to a farmhouse some miles away. The German farmer and his family were relocated to the barn.
18 April 1945
About lunchtime John’s group moved to an American Army encampment. Next, the group moved to Nürnberg (Nuremberg) and were informed that they would be handed over to AMGOT (Allied Military Government of Occupied Territories). AMGOT wanted to move John and his comrades back toward Stalag 383. This arrangement did not suit John, who wanted to move forward, not back. So, John and Rene decided to make their own way home. First, they got a ride in an American Army truck heading northward. However, the truck dropped them in the middle of nowhere. They walked to the nearest village, which was occupied by the Americans. They were taken into custody and interrogated by an American intelligence officer. As John had letters from home and some official documents on his person that substantiated his story, he was eventually released from custody. John was sent to the guardroom where the Military Police made him welcome, but Rene was not released. The commander of the guard kept referring to John’s ‘kraut’ friend (meaning Rene).
Next morning, driving out of the village, John passed a large PoW stockade and one of the prisoners was Rene. John was told that Rene was not a Frenchman, but a German Obergefreiter from a Panzer Grenadier Regiment stationed near Regensburg. When his unit’s camp was about to be overrun by the Americans, Rene had fled and hidden in a nearby forest. Later, he had murdered a French PoW and stolen his identity. John never learned the German soldier’s real name or his fate.
19 April 1945
John was taken to a US airfield where he waited for a flight home. A group of American servicemen took him under their wing and entertained him. While at the airfield, John said he watched the film White Christmas, but he was mistaken as the movie was not released until 1954. He probably watched the film Holiday Inn (1942), which featured Bing Crosby singing the song White Christmas.
20 April 1945
After waiting around all morning on the runway, John and two British officers were told they would be put on a flight to Ghent, Belgium, but due to bad weather the flight was re-routed to Paris, France. The flight landed about 17.00hrs and they were taken to a US Rest Centre nearby.
22 April 1945
Finally, John got a ride on an RAF Transport Command, Handley Page Hampden aircraft to RAF Croydon. Next, John went to Chalfont Saint Giles and then to Worcester. Two days later, he was on a train home. When John left for France in 1940, he weighed 12 stone 8oz. On his return to England, he weighed just 8 stone 3oz, but he was home at last.
A telegram announcing John’s arrival home, which reads: ‘John Stafford arrived yesterday evening without a rag to his back or a penny in pocket. Mother naturally shocked at his appearance but getting over it. Charles.’
Primary sources
John Thorne’s family provided a range of official documents, maps, books, and photograph albums plus 50-pages of handwritten testimony about his wartime experiences and his life in various prisoner of war camps.
Secondary sources
1. Buffs (Royal East Kent Regiment), see: https://en.wikipedia.org/wiki/Buffs_(Royal_East_Kent_Regiment)
2. Destination Dunkirk: The Story of Gort’s Army, Gregory Blaxland, William Kimber & Co. Ltd., 1973, pp. 121-129
3. Commonwealth War Graves: https://www.cwgc.org/find-records/find-war-dead/casualty-details/2279541/john-arthur-lungley/
4. Destination Dunkirk, Blaxland, p. 131
5. Stalag XXA https://en.wikipedia.org/wiki/Stalag_XX-A and Torun Fortress https://en.wikipedia.org/wiki/Toru%C5%84_Fortress
6. Stalag XX-B Marienburg, Danzig https://www.forces-war-records.co.uk/european-camps-british-commonwealth-prisoners-of-war-1939-45
7. The Barbed-Wire University: The Real Lives of Allied Prisoners of War in the Second World War, Midge Gillies, Aurum Press Ltd, London, 2011, pp. 76-83
8. British Red Cross, Museum and Archive, Prisoner of War Food Parcel webpage, accessed 15 May 2022 https://museumandarchives.redcross.org.uk/objects/8944
9. Prisoner of War: The Story of British Prisoners held by the Enemy, Noel Barber, George G. Harrap & Co Ltd, London, 1944, pp. 13-17
10. Glowing Embers, R. Philip Smith, Jarrold and Sons Ltd, Norwich, 1946, pp. 7-19
11. Prisoner of War, Barber, pp. 40-49
12. The Barbed-Wire University, Gillies, pp. 271-288
Additional resources
The Red Cross Museum archive https://museumandarchives.redcross.org.uk/objects/29269
The Museum of St. John https://museumstjohn.org.uk/st-john-during-the-second-world-war/
Stalag 383 Bavaria: A History of the Camp, the Escapes and the Liberation, Stephen Wynn, Pen & Sword Military, 2021.

George's War: From Harpenden to Berlin with No. 1 Special Wireless Group
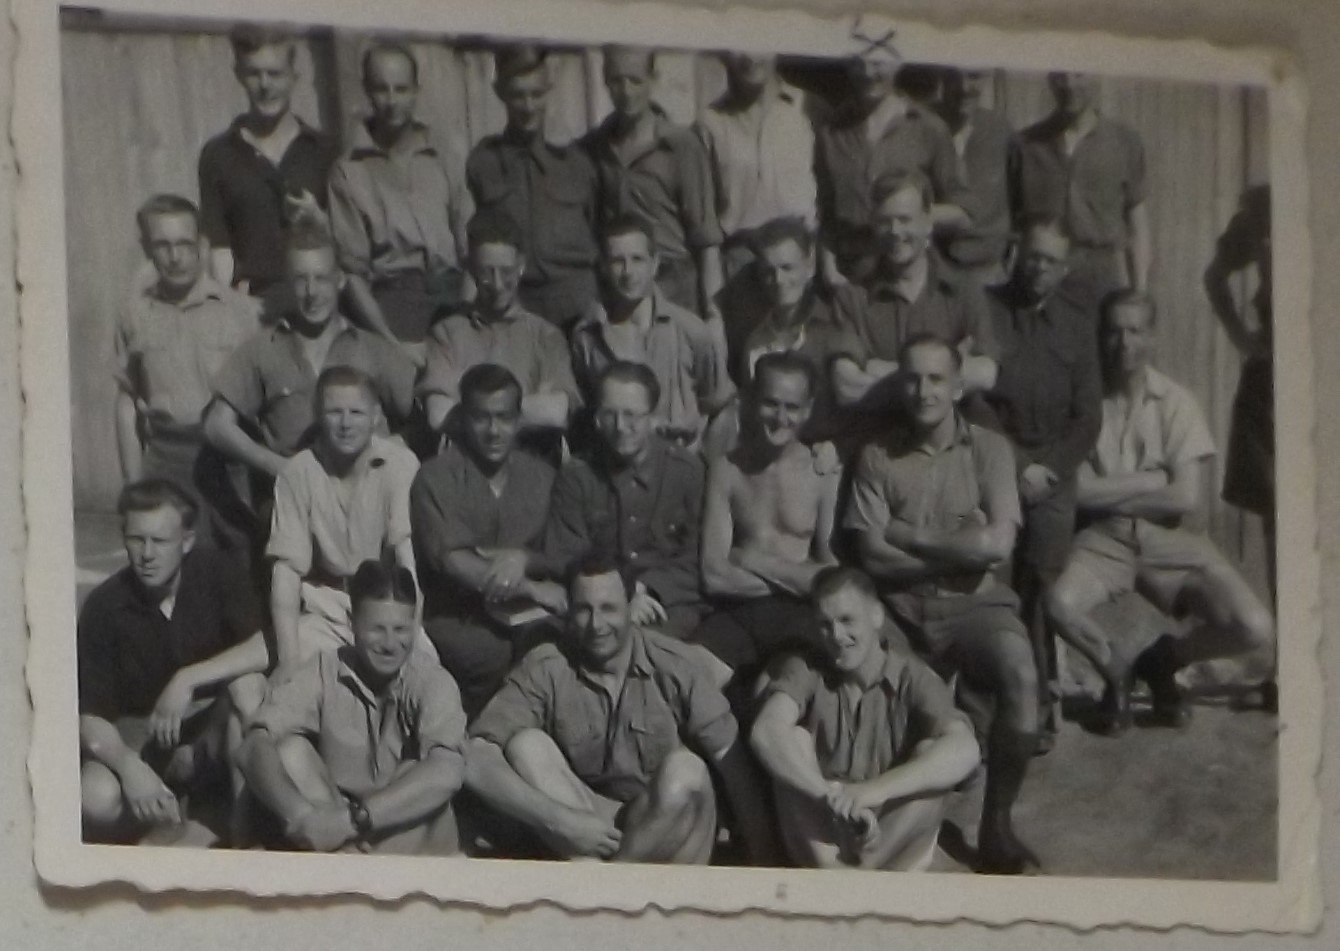
In this blog post, we examine the wartime service of George Trumpess, who was a member of No. 1 Special Wireless Group, Royal Signals. During the Second World War, 40 Special Wireless Sections were engaged in enemy radio traffic intercepts for the Army (Y Service). George would serve throughout the Campaign for Northwest Europe, and travel from sleepy Hertfordshire to the ruins of Berlin in 1945.
George Trumpess, left, at Brandenburg Gate, Berlin, 1945
Recently, a relative of mine had the unenviable task of having to clear the contents of his late parent’s house. Among the countless objects accumulated over a lifetime emerged a large, handcrafted wooden box and several photograph albums. The box contained an assortment of Second World War German medals and coins. The photograph albums revealed a tantalising glimpse into George Trumpess’s wartime service with the Royal Signals. George had been very circumspect about his military career.
George’s collection of Second World War German medals, Nazi currency, assorted photos, and his own campaign medals
Initially, I started my research into George’s unit by contacting the Royal Signals Association on the social media platform Facebook. One member of the Facebook group recommended I contact Bletchley Park. Officially, the Government Code and Cypher School (GC&CS), Bletchley Park was a top-secret centre of Allied codebreaking during the war also known as Station X. Dr Thomas Cheetham, Research Officer at Bletchley was able to provide the following:
George was a member of No. 1 Special Wireless Group (1 SWG), who would become 1 Special Wireless Regiment (1 SWR) in late 1945. 1 Special Wireless Group comprised of army signals units intercepting, decrypting, and analysing low-grade German Army radio traffic and cyphers in the field. It operated in Northwest Europe from D-Day onwards.1
George in the ruins of the Reich Chancellery, Berlin, 1945
Dr Cheetham was not able to provide any information on the Regiment’s post-war activities. However, it appears that 1 SWR was collecting signals intelligence (SIGINT) on the Soviets immediately after the war, although they were still our allies at the time.
Dr Cheetham recommended that I contact the Military Intelligence Museum, which I did. Alan Judge, Corps Historian, Military Intelligence Museum responded with the following:
Not a lot is known about this unit. It started as 1 Wireless Intelligence Company (WIC) of No. 1 Special Wireless Group, which formed up in November 1945 with a strength of 18 officers and 90 other ranks. Both these units were in Gneisenau Kaserne in Minden. 1 WIC's role was signals intelligence, they listened, initially, for clandestine radio transmissions from the remnants of the Nazi resistance units until it became obvious that Nazi resistance was no longer a threat.
However, the threat from the Soviet Union was then becoming more apparent and the unit started to pay more attention to the USSR and the countries under its domination. By 1949, 1 Wireless Group had been re-designated 1 Wireless Regiment and moved to Nelson Barracks in Münster. Detachments were in Berlin at RAF Gatow, Efeld, Cuxhaven, Iserlohn, and Plön in Schleswig-Holstein. In 1970 it was renamed 13 Signal Regiment, which moved into Mercury Barracks near Birgelen on the Dutch/German border in 1955. The unit had a strong Intelligence Corps representation as well as around 80 Women’s Royal Army Corps (WRAC) personnel. There followed a series of moves until 1994 when 13 Signal Regiment closed for good.2

© IWM A 21474, SPECIAL WIRELESS MOBILE UNITS. 30 JANUARY 1944, NEVE, POOL.
Formation of 1 SWG
No. 2 Company, GHQ Signals went to France with the British Expeditionary Force (BEF) in 1940.3 In July, following the evacuation of the BEF from Dunkirk, the unit was renamed No. 1 Special Wireless Group. The unit was based at Rothamsted Manor, Harpenden under the command of Lieutenant-Colonel A.E. Barton.4 1 SWG remained at Harpenden until 22 June 1944, when they closed down Rothamsted Manor and moved in three shifts (A, B and C) of eight detachments to Normandy.5
During the Second World War, 40 Special Wireless Sections were engaged in enemy radio traffic intercepts for the Army (Y Service). Each Section was a composite of Royal Signals operators, Military Intelligence, often with linguistics skills, and Royal Army Service Corps (RASC) providing drivers and logistical support. The parent organisation was the Wireless Group, which trained Signals operators, held stores of equipment and spares, and ran training courses for Intelligence officers and NCOs on Signals sections.6
Recruitment & Training of Special Operators
The recruitment of Y Service operators required the candidates to pass an IQ test, demonstrate an ability to work under pressure, and have the patience to wait for hours until an enemy radio station started broadcasting. Candidates had to show that they were mature enough not to gossip about their work. They also had to be mentally and physically resilient, often working long hours with little sleep and irregular meals. Forces operators’ training lasted 19 weeks, which included both basic military and technical training.7
Basic training for wireless operators consisted of 6-hours of military training and 2-hours of technical training per day. After an aptitude test, those selected for further training were sent to the Special Operations Training Battalion (SOTB), situated in Douglas, Isle of Man, from 1942.8
In his memoir, Major G.K. Rothwell, 1 Special Wireless Group, described his extensive training:
The initial training was standardised for all arms and comprised six weeks of rigorous and exhausting infantry training. The training day ran from 07.30 to 18.00 including Saturdays. It was only after four weeks, when we were fitted with Battle Dress, that we were allowed out on a Sunday afternoon to go to the Club at Camp Centre.
After leave I was instructed to proceed to the Isle of Man where the Special Operator Training Battalion was located. A long row of Boarding House along the promenade had been requisitioned and the promenade divided in half by a wire mesh fence. Special Operators were trained to receive and send Morse to British Army standards and additionally learnt the styles, codes, and procedures of German and Italian services.
After three months or so there was a test which eliminated the less proficient. The remainder continued the course until they qualified as Operator Special Class II after six months or so. Training continued with operational training, meaning one practised monitoring actual German networks. Additionally, Japanese procedures were taught as the Japanese Morse alphabet had 72 characters this was not at all simple.
So, the training lasted over a year (extraordinary for the wartime), and it was not until April 1944 that I was to join No. 1 Special Wireless Group, then located in a large country house at Rothampsted in Harpenden.9

© IWM CM 2448 The interior of the wireless telegraphy receiving van of an RAF Wireless Observer Unit post in the Western Desert, showing the W/T operators at work.
1 SWG & Campaign for Northwest Europe
The long-awaited Second Front finally opened with the D-Day landings on 6 June 1944. On the morning of D-Day, the mobile section (MobSec) of 1 SWG identified 21st Panzer Division moving from Falaise toward Ouistreham (Sword Beach). As a result, the Division was subjected to an Allied air attack. Next, having found the road bridge over the Caen Canal (Pegasus Bridge) in the hands of British 6th Airborne, 21st Panzer had to detour via Caen, which delayed their planned counterattack until 16.30hrs. When they finally attacked, 21st Panzer lost approximately 50 tanks from a strength of 127. Nevertheless, they did frustrate General Montgomery’s planned objective of taking the city of Caen on D-Day.10
From the 14 June, MobSec, 1 SWG started to waterproof their vehicles in anticipation of crossing to Normandy. However, they were then ordered to de-waterproof them at the end of July. Finally, on 8 August the unit received its movement orders, and arrived in Normandy on 10 August 1944.11
Operation OVERLORD, the Battle for Normandy, raged on for three months. The Germans finally withdrew across the river Seine at the end of August 1944. After weeks of inching forward in the notoriously closed country of the Normandy bocage, the Allies suddenly made spectacular advances into France and Belgium.
In August 1944, Major Rothwell, 110 SWS, was monitoring German radio traffic in the Falaise Pocket:
The Germans were using a three letter Book Code. A Book Code provides little or no protection if the enemy has a copy of it. Now we did have a copy of the code book! So, when I began picking up a long message in this code, the Intelligence chap was sitting on the back steps of the radio van decoding it as I handed him each sheet as it was completed. And it turned out to be the complete plan for the counterattack the Germans planned at Mortain.12

© IWM BU 531 The crew of a Cromwell Mk IV tank of 2nd Welsh Guards on the drive into Brussels, 3 September 1944.
On 1 September 1944, one detachment of the 110 Special Wireless Section (110 SWS) was attached to the Guards Armoured Division. The remainder of 110 SWS was attached to XXX Corps HQ, following in the wake of the Guards as they advanced across Belgium. On 3 September, Guards Armoured liberated the Belgium capital of Brussels. Corporal Harold Everett, 110 SWS, recalled the liberation and subsequent celebrations:
The noise, the ecstasy of the crowd, the knowledge that we, the British, were the cause of this great outburst of joy and gratitude gave us feelings of pride and pleasure that it is impossible to put into words. I felt emotionally super charged. On that September day I lived a moment in history that I can never live again.13
Between 5 and 9 September 1944, Shift B of 1 SWG moved six officers, 174 other ranks and 43 vehicles to a transit camp in Wickham, Hampshire. Next, they embarked on Landing Ship, Tank (LST) 158 sailing from Gosport and landed at Arromanches, Normandy. Similarly, Shift C landed in France on 15 September 1944. 1 SWG then moved from Amiens to Brussels, Belgium.14
On 14 September, 1 SWG and 1 Special Intelligence Company (1 SI Coy) moved to Brussels to set up an important intercept station.15 According to Hugh Skillen, Ultra and Y Section intelligence indicated a rapid build-up of German forces in the Arnhem-Nijmegen area at least one week before the start of the ill-fated Operation MARKET-GARDEN.16
Detachments of 1 SWG were operating in Eindhoven, Holland during Operation MARKET-GARDEN (17 to 25 September 1944) but the unit’s war diary makes no mention of it.17 At the end of September MobSec, 1 SWG was attached to the American 12th Army Group.18
During November, No. 7 SW Section (Type A: Army HQ), 109 and 110 SW Sections (Type B: Corps HQ) arrived in the Brussels area. According to the war diary, the winter passed without Christmas, the New Year or Operation VERITABLE. The same phrase is repeatedly used in the war diary: Nothing of importance to record. Presumably, the lack of information recorded in the war diary at a group level is a security precaution in case the documents were ever captured.19
On 13 December 1944, the war diary for MobSec, 1 SWG mentions a force of 20 Germans 3-miles from their positions, and the men having to stand to until the morning. On the 16 December, the war diary records a breakthrough of German forces North of their position at Chattancourt close to the Meuse River. This attack was the Ardennes Counteroffensive, the last major German offensive of the war, also referred to as the Battle of the Bulge. During the night and early morning of the 23/24 December, the war diary records enemy air activity and some bombing nearby but no casualties.20
In February 1945, following leave in the UK, Major Rothwell returned to Holland and Operation VERITABLE (the clearing of German forces from the West bank of the Rhine):
I returned to the section at Issum in Holland, where the Reichwald Forest was slowly being cleared in some very bitter fighting and preparations were being made for the crossing the Rhine. Shift working was back, with a continuous system without free days. The shifts were worked so: 08.00 –13.00, 22.00 – 03.00, 13.00 – 17.00, 03.00 – and then 17.00 – 22.00 before starting round again.
And when one was not on a radio set, sleeping, meals washing (self & cloths) weapon cleaning, sentry duty and various other chores had all to be fitted in. And whenever we moved the old latrine pit had to be filled in and new slit trenches dug at the new site!21
During the winter months of 1945, 110 SWS repeatedly moved locations, setting up new stations, transmitters, and continually changed cypher books. At the same time, leave was organised in the UK and Paris. On 8 May 1945, the war diary for 110 SWS simply states that hostilities officially declared closed.22 The war in Europe was over for 1 SWG.
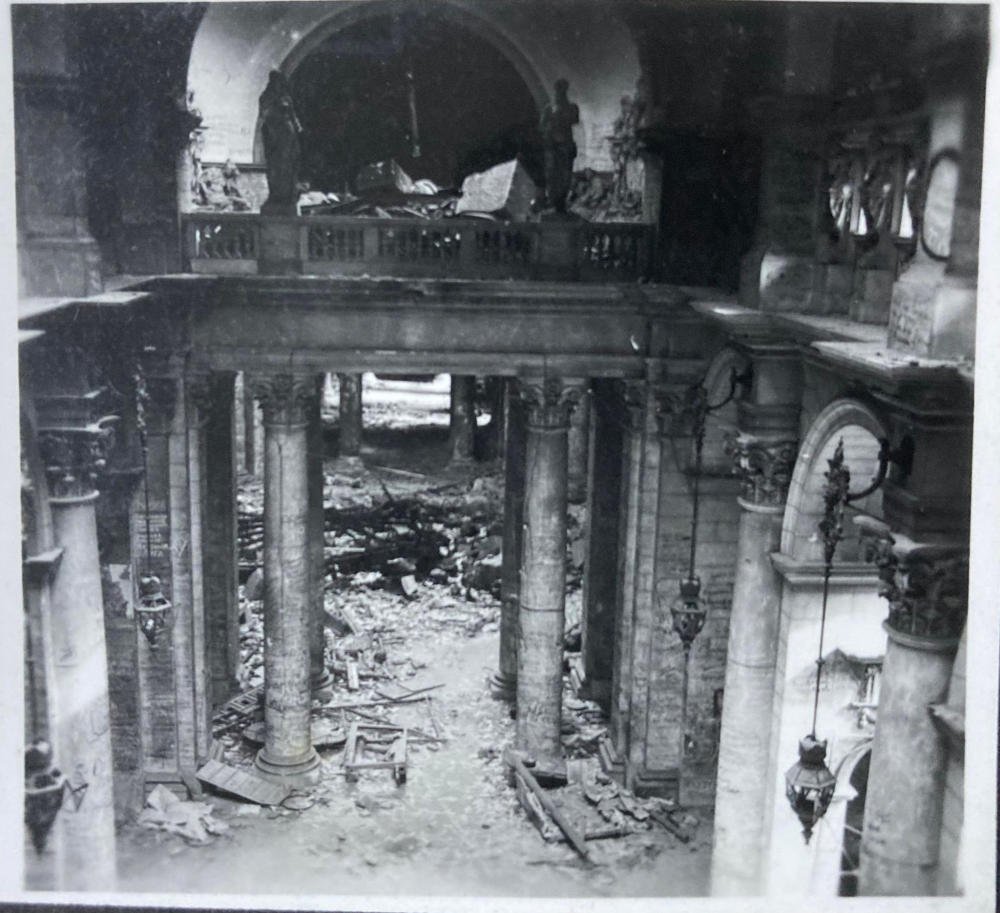
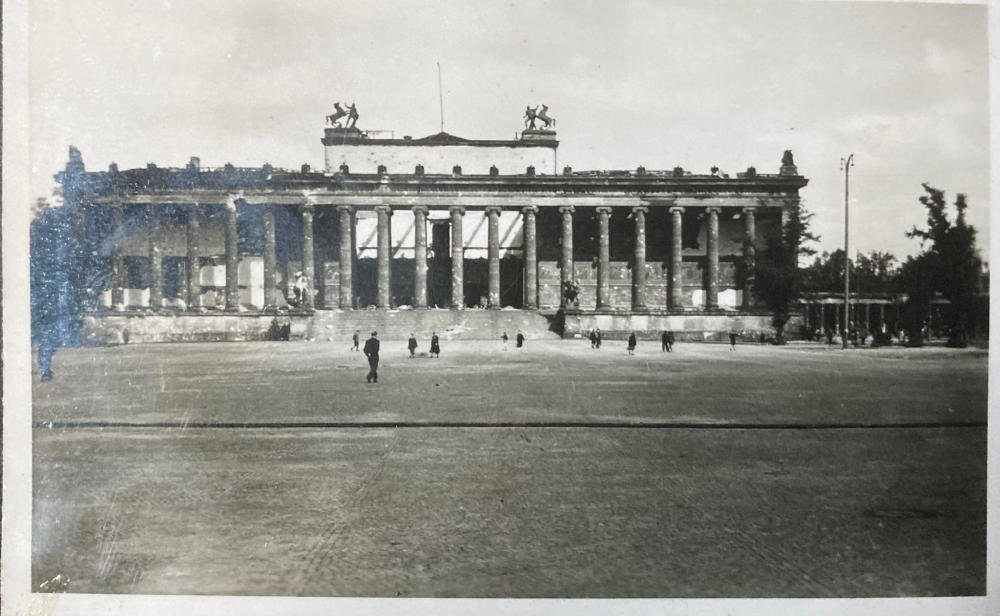
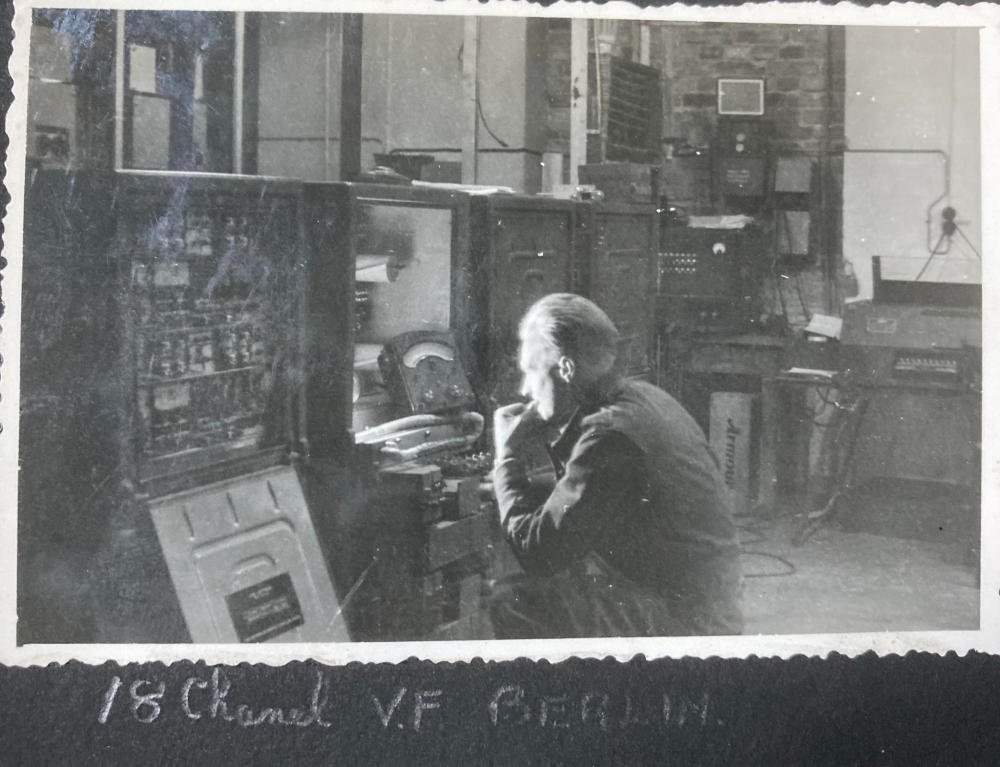
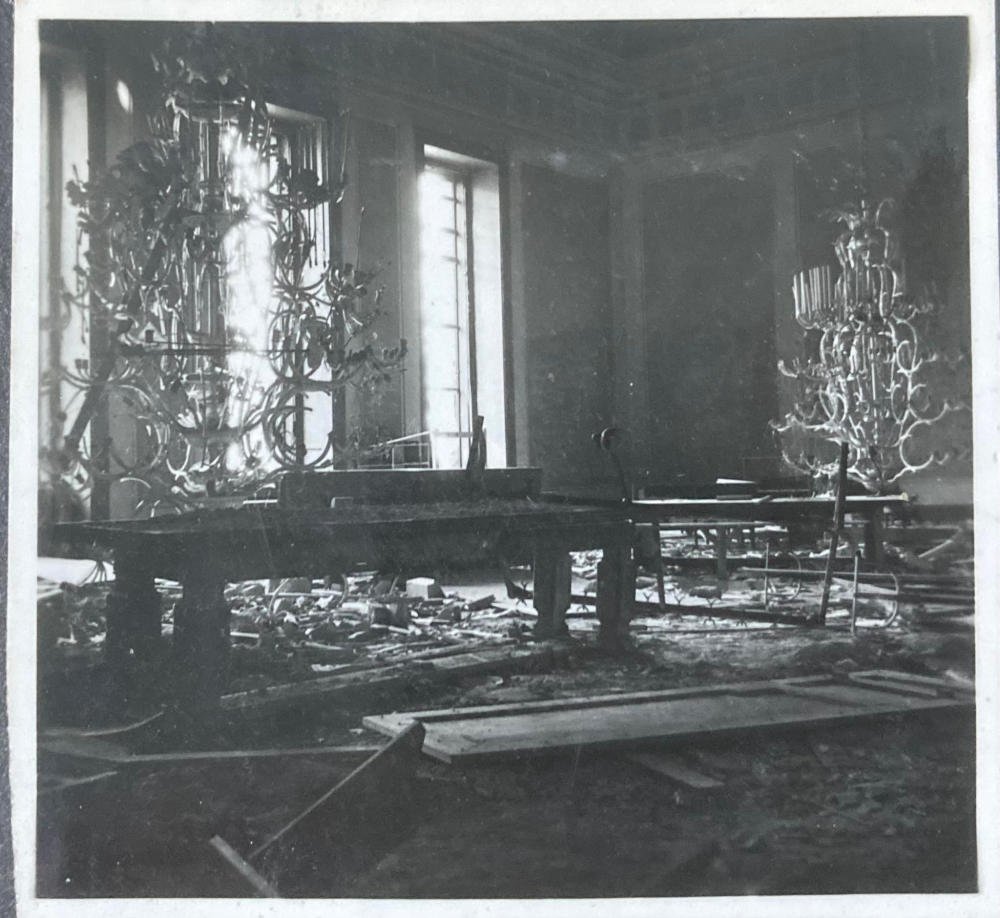
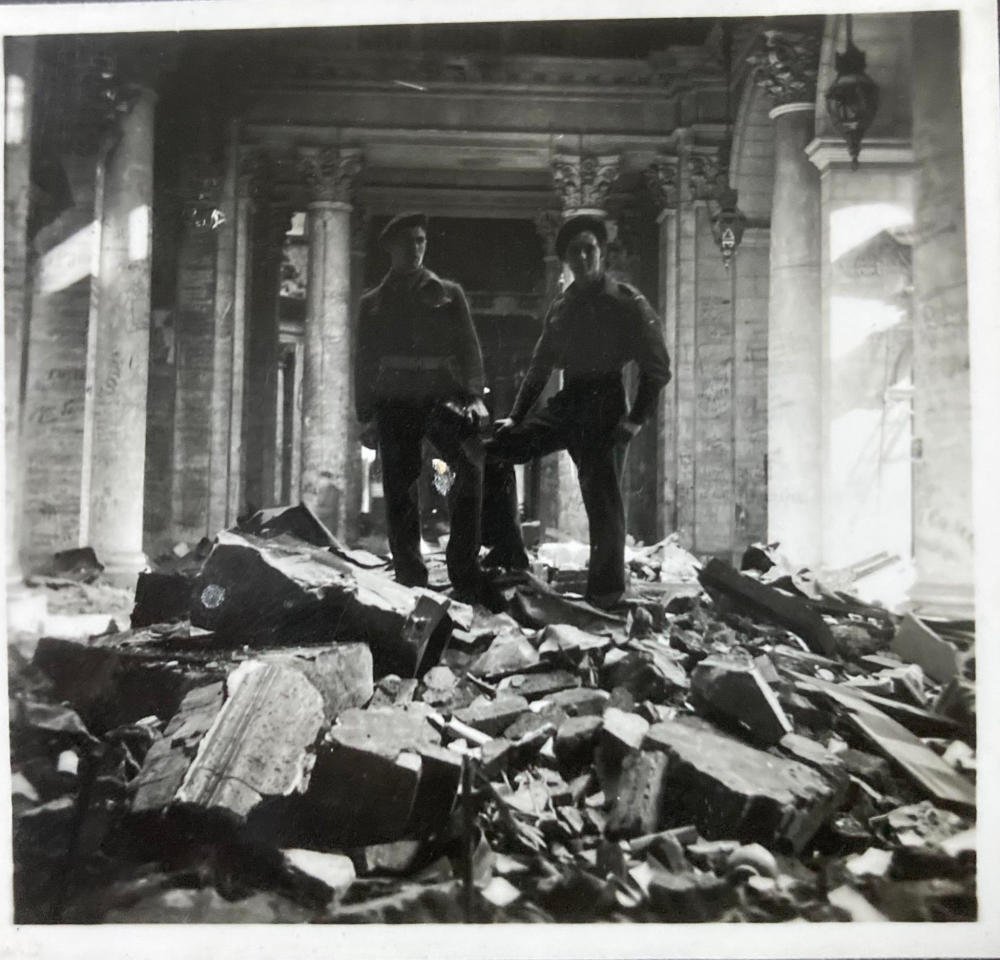
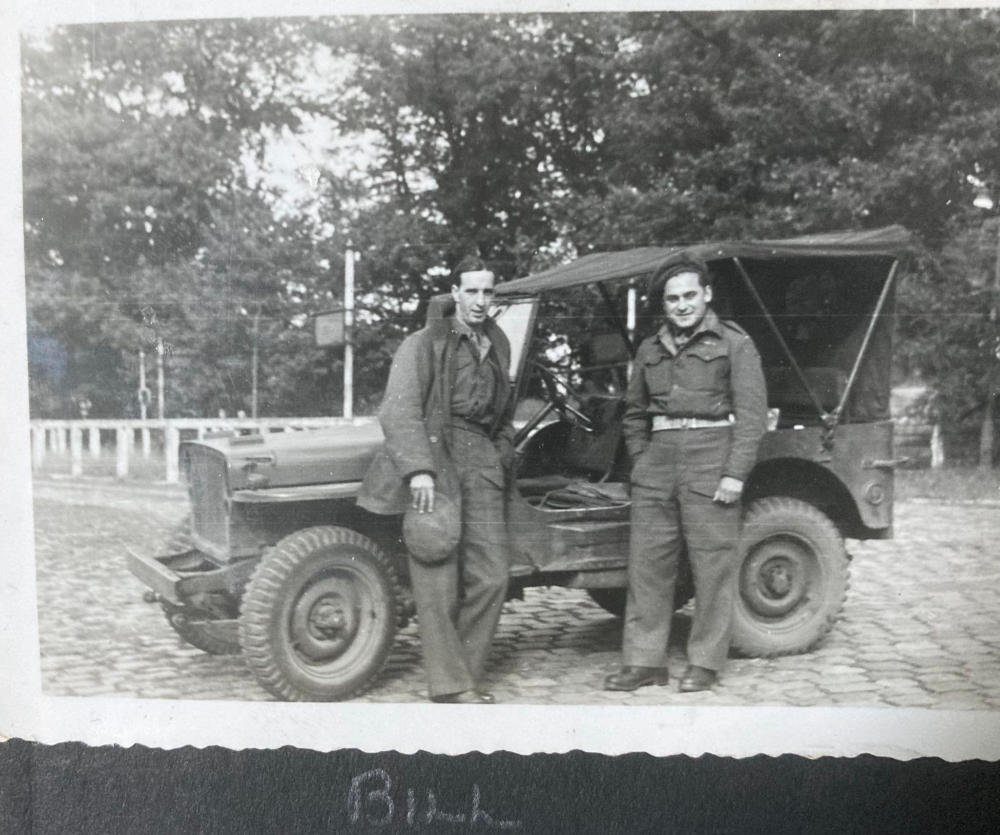
Visit George’s War in our Gallery section to see 46 photographs of George and his comrades in Berlin between 1945 and 1946. Click Here.
Victory in Europe & Russian Intercepts
By mid-April 1945, 1 SWG was located at Kempen, Germany, northwest of Dusseldorf. By June, the unit had moved to Minden, between Munster and Hanover. The War Diaries are silent about German capitulation in May 1945. Throughout the summer, 1 SWG remained busy and had numerous visitors from Signals Research and Development Establishment (SRDE) and Southeast Asia Command (SEAC). Of course, Japan would not be defeated until August 1945, and it was certain that some elements of Y Service would have been redeployed to the Pacific if the war had continued. In mid-July, the unit found time to exhibit captured German cypher equipment, visited by Chief Signals Officer, 21st Army Group. At the same time, some sections were being returned to the UK and demobilised.23
It seems that 1 SWG was intercepting Russian wireless and possibly landline traffic after May 1945. On 14 September 1945, GC&CS and Foreign Office prepared a draft policy paper on what radio traffic should be monitored in the immediate post-war period. Russia was a prime target for intelligence gathering. The paper stated:
The Russians are realists, and they will intercept our traffic and expect us to intercept theirs.
The paper continued:
Interception of Russian traffic is normally difficult for us, but owing to their present advance westwards, the opportunity to do so is good and an intense study could be made while there is a chance and resources available.24
As the Cold War got underway, GC&CS moved from Bletchley Park to Cheltenham in 1952, having changed its name to Government Communications Headquarters (GCHQ) in 1946.
References:
Dr Thomas Cheetham, Research Officer, Bletchley Park, museum & heritage attraction, https://bletchleypark.org.uk/, 2020.
Alan Judge, Corps Historian, Military Intelligence Museum, https://www.militaryintelligencemuseum.org/, 2020.
Hugh Skillen, Spies of the Airwaves: A History of Y Sections during the Second World War (London: H.M. Stationery Office, 1989), p. 56.
Skillen, Spies of the Airwaves, p. 110.
Skillen, Spies of the Airwaves, p. 397.
Skillen, Spies of the Airwaves, pp. 50-51.
Sinclair McKay, The Secret Listeners: The Men and Women Posted across the World to Intercept the German Codes for Bletchley Park (London: Aurum Press Ltd, 2013), pp. 6-7.
Skillen, Spies of the Airwaves, pp. 50-51.
The Y Service 1939-1945, Major G.K. Rothwell (Ret'd), extract from his biography, from March 1943 to June 1945, https://www.goldbeach.org.uk/yservice/Rothwell.htm, downloadable PDF, 2021.
Skillen, Spies of the Airwaves, pp. 397-398.
The National Archives (TNA), WO 171/2042, Mob Sect, No. 1 Special Wireless Group, June to August 1944.
Rothwell, The Y Service 1939-1945.
Skillen, Spies of the Airwaves, pp. 432-433.
TNA, WO 171/2041, War Diary, No. 1 S.W. Group, R. Signals, 5 to 9 September 1944.
Skillen, Spies of the Airwaves, p. 431.
Skillen, Spies of the Airwaves, pp. 441.
TNA, WO 171/2041, War Diary, No. 1 S.W. Group, September 1944.
TNA, WO 171/2042, War Diary, Mob Sect, September 1944.
TNA, WO 171/2041, War Diary, No. 1 S.W. Group, September 1944 to November 1945.
TNA, WO 171/2042, War Diary, Mob Sect, December 1944.
Rothwell, The Y Service 1939-1945.
TNA, WO 171/6051, War Diary, 110 S.W. Section, 1 January to 30 June 1945.
TNA, WO 171/2041, War Diary, No. 1 S.W. Group, April to September 1945.
Kenneth Macksey, The Searchers: Radio Intercept in Two World Wars (London: Cassell Military Paperbacks, 2003, (reprinted 2018), p. 274.
Additional resources:
Birgelen Veterans Association
BOAR Locations, Mercury Barracks: https://www.baor-locations.org/MercuryBks.aspx.html
Royal Signals, Corps History: https://www.royalsignalsmuseum.co.uk/